Summer nail art reaches new heights with pink and yellow combinations that balance playfulness and sophistication. These color pairings work beautifully together, creating designs that feel both fresh and elegant. From soft ombre gradients to bold geometric patterns, the possibilities are endless.
Eight standout designs offer something for every skill level and preference. Hand-painted florals bring artistic flair to your fingertips, while quick polka dots provide instant visual impact without requiring advanced techniques.
Striped patterns, color blocks, and gradient blends round out the collection with varying degrees of complexity.
The right technique transforms basic manicures into true statement looks. Whether applying polish with precision or using tools like dotting pens and striping brushes, each method contributes to the final result.
Practice and patience make even intricate designs achievable for beginners.
Discovering which design suits your personality and aesthetic preferences might surprise you. Consider your daily routine, personal style, and comfort level with nail art when selecting your next summer look.
These eight options ensure everyone finds a combination worth trying.
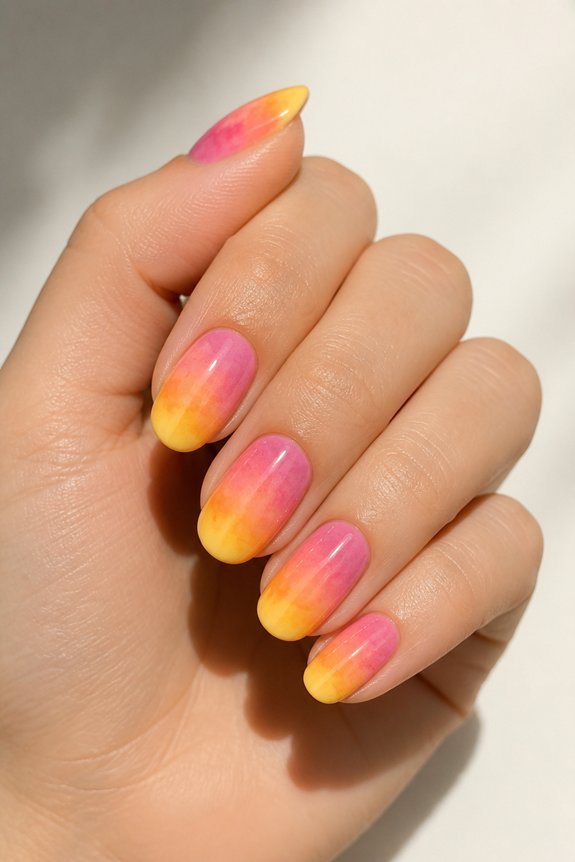
Pink and Yellow Ombre: Soft Gradient Blending
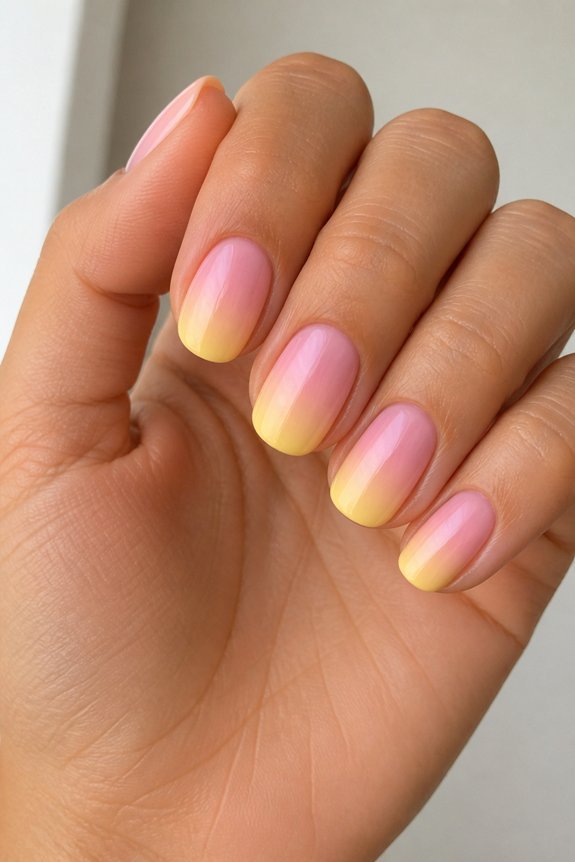
Start with pink polish as your base. This is your foundation, so apply it smoothly across the entire nail.
Now grab a makeup sponge and dab yellow polish on its edge. Gently press and stipple the sponge where the two colors meet. This creates that soft, dreamy transition you’re after. The key is using light touches, not pressing too hard.
A clear topcoat locks everything in place and gives your nails that polished finish. For the best results, grab quality polishes like Essie or Sally Hansen. The consistency matters more than you’d think. Thicker polishes create harsh lines instead of smooth blends.
Try adding fine glitter to the yellow tips for extra dimension and sparkle. It’s a small touch that makes a big difference.
Also read: 11 Spring Summer Nails for a Soft Bright Look
Pink and Yellow Daisy Chain: Whimsical Hand-Painted Florals
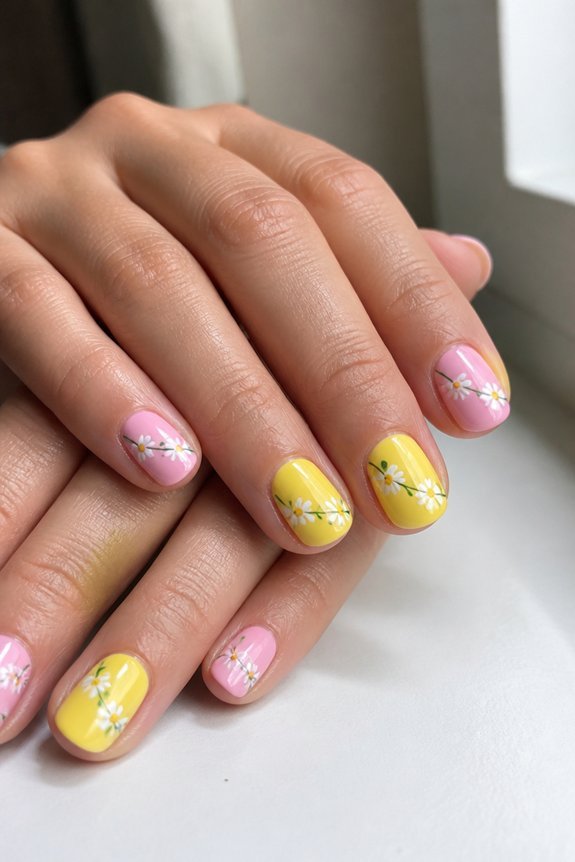
Start with a pale pink base coat and let it dry completely. You’ll build your daisies on top of this soft foundation.
Use a fine detail brush to paint soft yellow petals in a circle. Add a tiny white dot in the center of each flower. Connect your daisies with curved green stems to make them flow naturally across the nail.
The key is taking your time with each brushstroke. Quality supplies like Sally Hansen’s Art Pen help you get those precise lines. Unsteady hands? Practice on paper first to build confidence before tackling your nails.
Once your design is done, here’s a pro tip: apply matte topcoat to the background while keeping the flowers glossy. This contrast makes your daisies pop and look more polished. The result feels both playful and elegant, perfect for any summer gathering.
Pink and Yellow Candy Stripes: Bold Color Block Statement
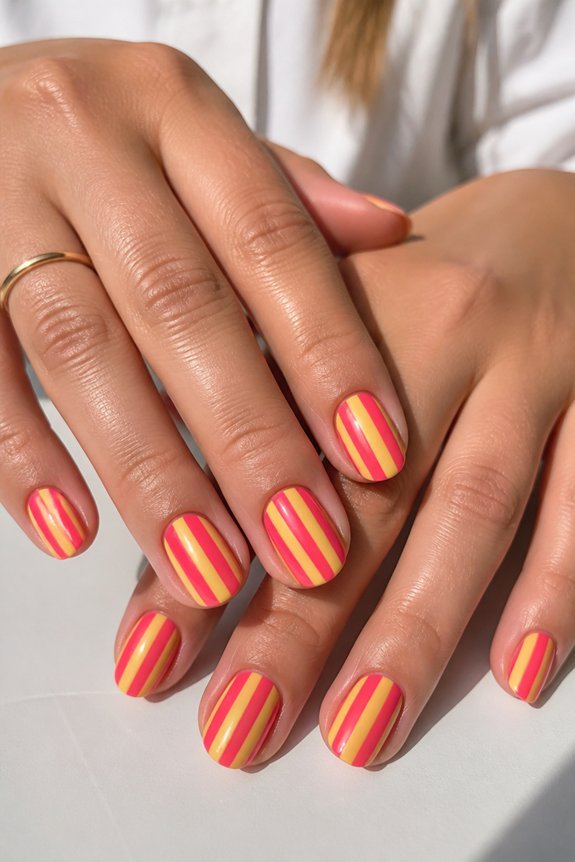
Bold candy stripes are all about making a statement. Think hot pink and sunshine yellow in equal bands that pop right off your nails. The high contrast and clean lines grab attention without trying too hard.
Here’s how to nail this look. Start with a base coat like Essie’s “Ballet Slippers” for a smooth foundation. Grab some painter’s tape to keep your stripes crisp and defined. Once you’ve painted your alternating colors, seal everything with a gel top coat to keep it fresh longer. The result? A playful yet polished design that works beautifully for summer events and shows off your confidence through color.
Pink and Yellow Tropical Sunset: Blending Like a Watercolor
Pink and Yellow Tropical Sunset: Blending Like a Watercolor
Love the idea of soft, romantic nails? Skip the bold stripes and try this watercolor approach instead. You’ll blend pink and yellow together for a dreamy, sunset-inspired look that feels effortless.
Begin with a pale yellow base. Grab a damp sponge and dab soft pink onto the upper third of your nail, pressing gently so the edges blur naturally. This sponging trick gives you those beautiful color shifts without any harsh lines. Pop translucent coral in between the two shades for extra warmth and dimension.
Cream formulas work best for this technique because they glide across your nails smoothly. Shimmer finishes can be tricky, so stick with brands like CND or OPI that blend like a dream. Finish everything with glossy topcoat to make those colors really glow and catch the light beautifully.
Pink and Yellow Polka Dots: Quick Patterns for Dot-Tool Beginners
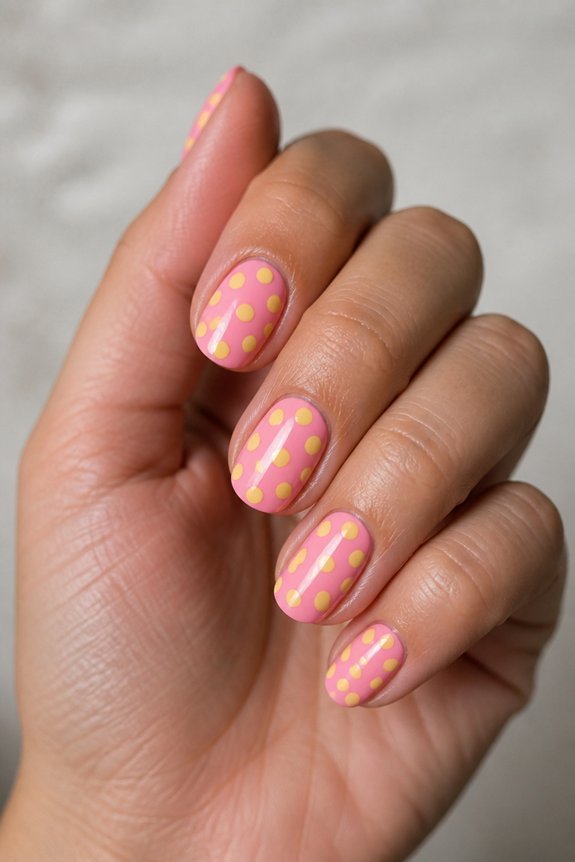
Polka dots are perfect if you’re just starting with nail art. You don’t need fancy skills or a steady hand to pull this off. Grab a quality dotting tool like the Ciate London Double-Ended Dotting Pen and you’re halfway there.
Start by painting your nails with a pale pink base coat. Let it dry all the way. Then grab yellow polish and start dotting.
Mix up your dot sizes to keep things interesting. Make tiny dots near the tip of your nail for depth. Go bigger with the dots toward the base. Skip the perfect rows and scatter them randomly instead. Uneven placement actually looks more natural and hides any wobbly dots.
Finish with a glossy top coat so your design lasts. This pattern looks great on short nails, long nails, square shapes, or rounded ones. Pick whatever works best for you.
Geometric Pink and Yellow Shapes: Modern Lines and Triangles
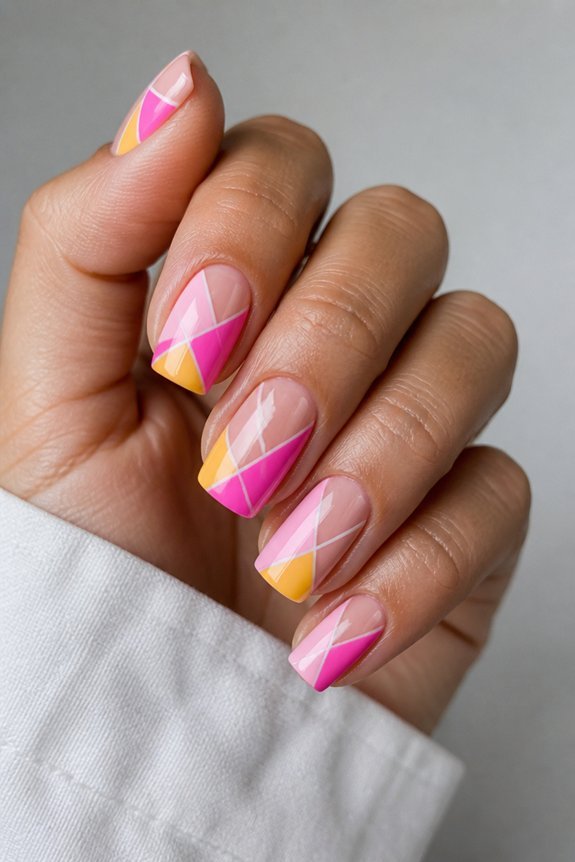
Geometric designs take nail art to the next level. Think structured patterns, sharp angles, and contemporary vibes. You can create these looks using thin striping brushes or tape for clean, precise edges.
Try alternating triangles across your nails for a fresh effect. Start with a pale pink base, then add bold yellow shapes on top. The contrast really makes the design pop.
Want crisp lines? Invest in quality tools like angled brushes. Steady hands help too, but good equipment does most of the work.
Negative space is your friend here. Leave some nail unpainted to let the design breathe. Mix transparent and opaque polishes to add depth and dimension.
Orientation matters more than you’d think. Vertical or diagonal lines elongate shorter nails and draw attention upward. This simple trick makes a real difference in how your nails look.
French Tips With a Pink and Yellow Twist: Colored Gradient Edges
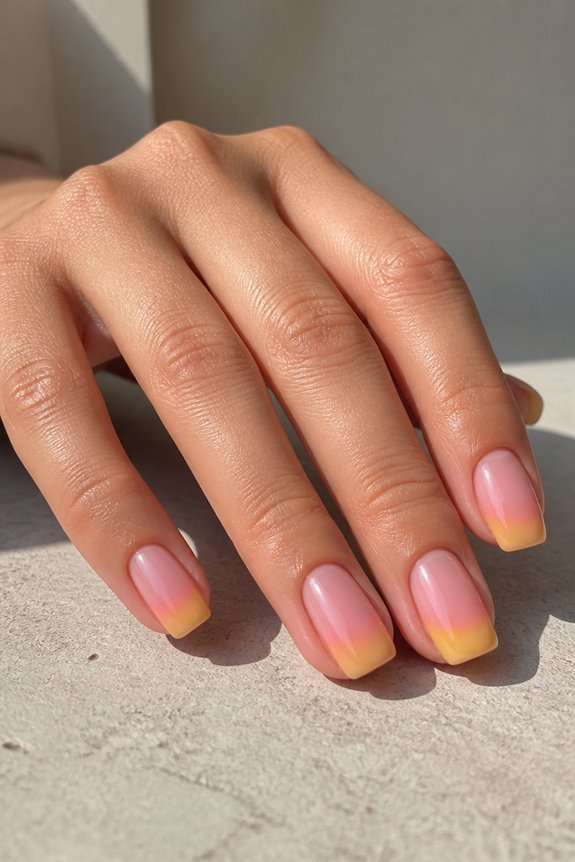
A fresh take on the classic French manicure brings color and movement to traditional nail design. Swap the stark white tips for soft pink and sunny yellow gradients that blend seamlessly into neutral bases.
Getting the technique right takes practice. Start with a sheer nude or pale pink foundation covering your entire nail. Then apply your gradient on the tip using two complementary shades that fade into each other.
Gel polishes like Gelish or OPI work best for smooth blending. A damp sponge helps you create those soft transitions between colors. The ombre effect looks polished and takes your everyday nails up a notch.
This modern twist keeps things sophisticated while adding summer vibrancy. You can rock it at the office or on a casual day out.
Pink and Yellow Marble Swirl: Swirled and Streaked Design
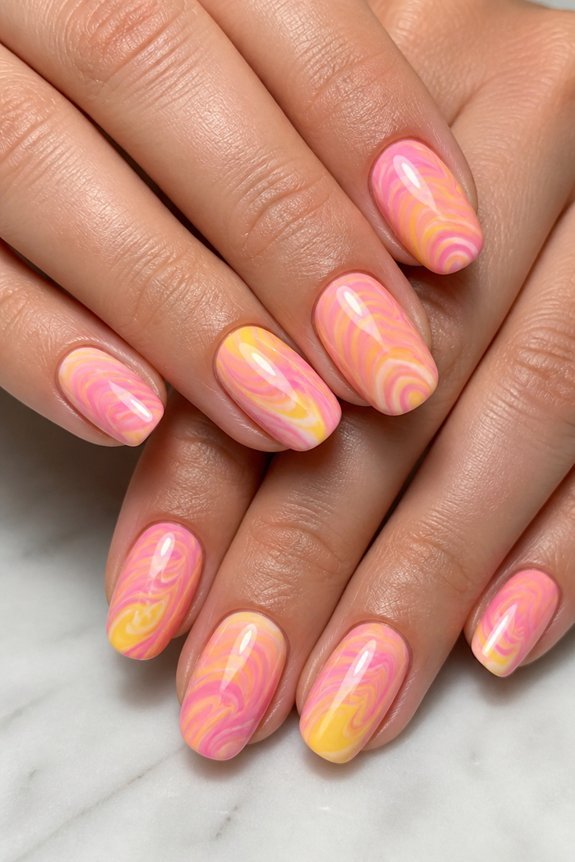
Start with a white or cream base coat. This gives your marble design the perfect canvas to shine.
Next, apply alternating strokes of pink and yellow polish while they’re still wet. Grab a thin brush or toothpick and gently drag it through the colors to create those gorgeous streaked patterns. The key is keeping a steady hand and moving slowly through the wet polish.
Sally Hansen’s Hard as Nails polish is fantastic for this look. It applies smoothly and gives you vibrant colors that really stand out. The swirled finish catches the light beautifully, adding depth that a flat color just can’t achieve.
Finish with a glossy top coat to protect your design and make it even more eye-catching. You’ll end up with something artistic and polished that looks perfect for summer.
Frequently Asked Questions
How Long Do Pink and Yellow Nail Designs Typically Last Before Chipping?
Pink and yellow nail designs typically last two to three weeks before chipping occurs. The longevity depends on nail growth rate, daily activities, and polish quality. Gel formulations extend wear time considerably compared to traditional lacquer applications.
What Base Coat and Top Coat Products Work Best With These Color Combinations?
Base coats like gel primers or calcium-enriched formulas create strong adhesion for pink and yellow polish. Top coats featuring UV protection and glossy or matte finishes seal colors effectively, preventing chipping and fading.
Can I Create These Designs on Short Nails or Do I Need Length?
Short nails work excellently for pink and yellow designs. These bright colors create visual impact regardless of length. Shorter nails may actually showcase intricate patterns and color blocking more effectively, making designs appear bolder and more defined.
How Do I Remove Pink and Yellow Nail Polish Without Staining My Skin?
One should apply acetone-based remover to a cotton pad and press it against each nail for ten seconds. Rubbing gently in circular motions helps lift polish. Applying cuticle oil afterward protects skin from staining and dryness.
What Nail Shape Complements Pink and Yellow Designs Most Effectively?
Almond and oval shapes are a million times more flattering for pink and yellow designs. These elongated silhouettes showcase vibrant colors beautifully, allowing the nail art to command attention while maintaining an elegant, balanced appearance that amplifies summer aesthetics.
Conclusion
These eight pink and yellow designs prove that summer nail art doesn’t require complexity. Whether choosing soft ombre gradients or bold geometric patterns, each style delivers personality and polish. The key to nailing these looks lies in quality tools and steady hands. From beginners to experienced artists, these combinations strike gold—offering accessible yet sophisticated options that transform any summer aesthetic into a statement of colorful confidence.