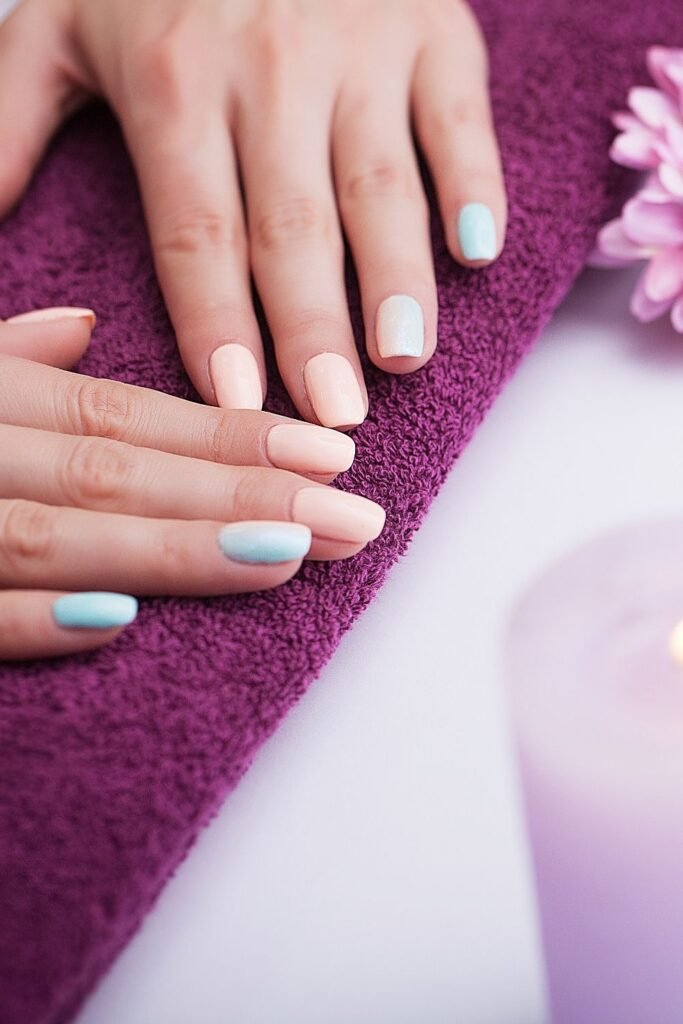
Pink is the quintessential Valentine’s Day color, offering endless possibilities for romantic and playful nail designs. Whether you prefer soft blush tones or vibrant hot pinks, this versatile shade works beautifully for expressing your love and celebration. The best part is that many stunning pink nail designs are surprisingly simple to recreate right in your own home.
DIY nail art at home has become so much more accessible than it used to be. With basic tools and a little patience, you can achieve salon-quality results without the expense or time commitment. I’ve discovered that starting with simpler designs and building your skills gradually makes the entire process enjoyable and rewarding for anyone willing to try.
In this guide, I’ve curated twenty-two pink Valentine’s Day nail designs that are easy enough for beginners yet beautiful enough to impress. Each design includes tips for recreating it at home with minimal supplies. Whether you’re looking for delicate patterns, elegant accents, or fun embellishments, you’ll find designs that make your Valentine’s Day nails look absolutely professional.


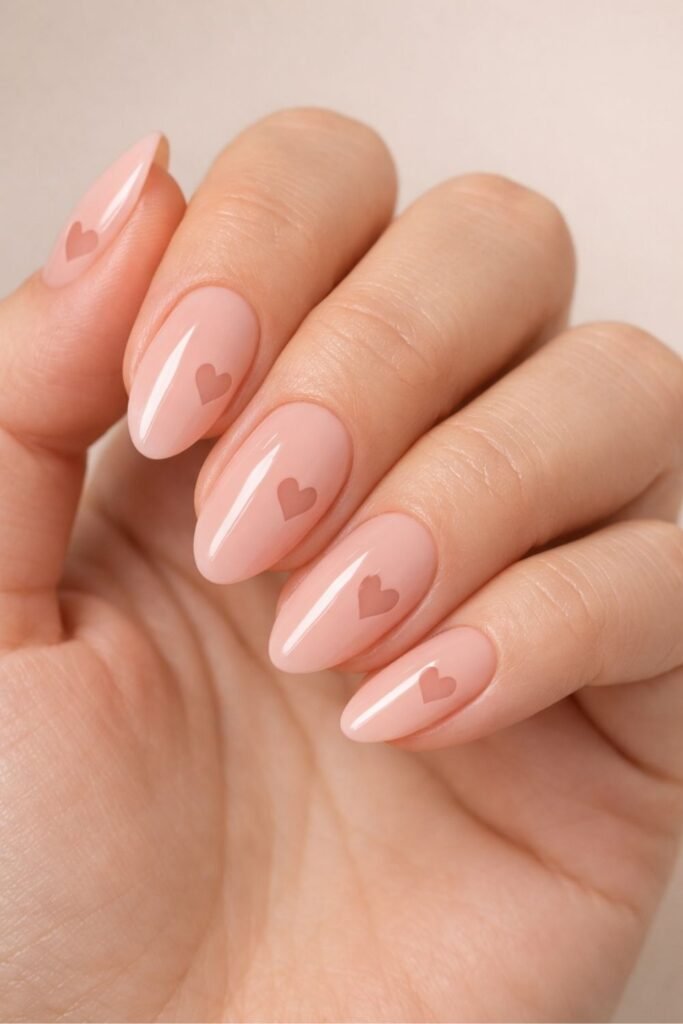
Soft Blush Pink With Delicate Heart Accents
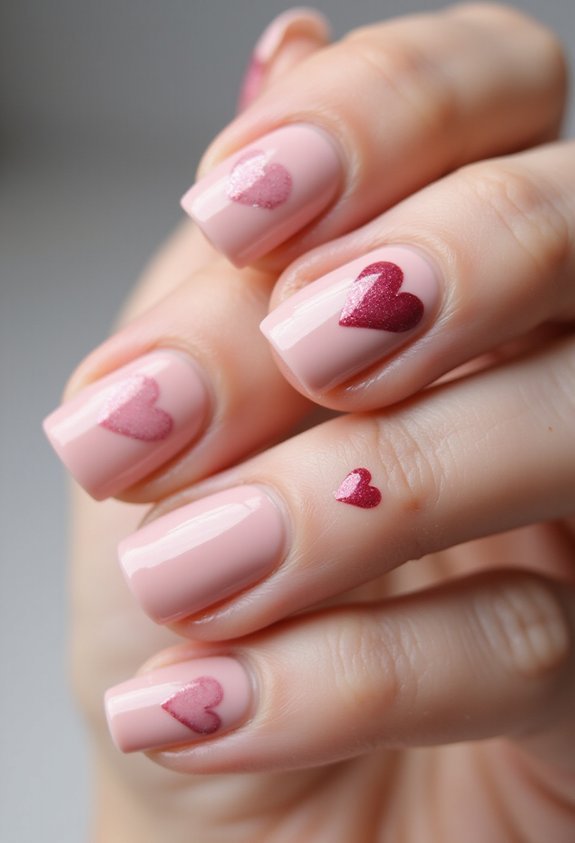
When you’re seeking an understated yet romantic Valentine’s look, soft blush pink with delicate heart accents delivers effortless elegance. This design pairs a creamy, pale pink base with tiny heart shapes in deeper pink or red across your nails.
You’ll start by applying two coats of blush pink polish for a smooth foundation. Once dry, you can use a thin brush or dotting tool to paint miniature hearts on select nails—try placing them on your ring fingers or creating a scattered pattern.
If hand-painting feels intimidating, you can purchase nail decals featuring heart designs instead. Either method takes just minutes to complete. The result? A sophisticated, romantic manicure that celebrates Valentine’s Day without appearing overdone or overly themed.
Also read: 18 Red Valentine’s Day Nail Ideas You’ll Love
Bold Fuchsia Solid With Minimal White Dots
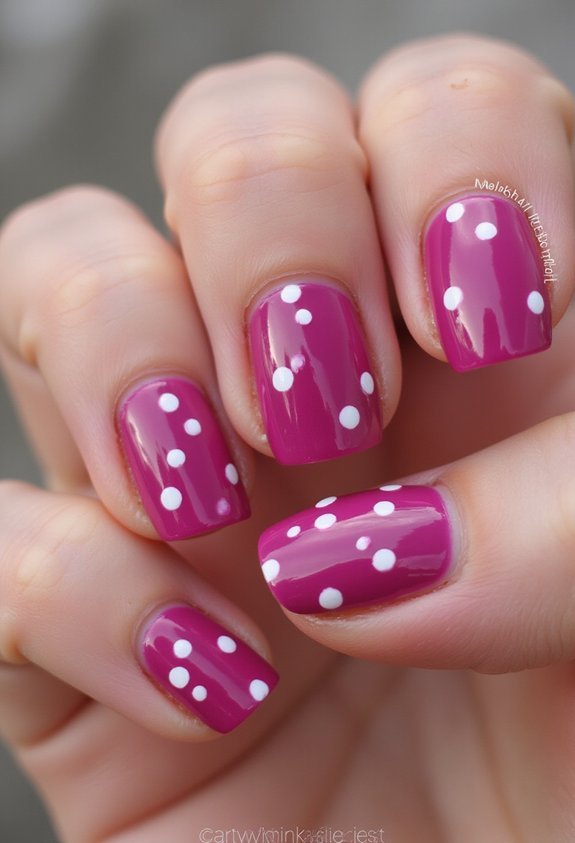
For a striking Valentine’s Day statement, bold fuchsia paired with minimal white dots creates vibrant impact without excess. You’ll love how this design commands attention while remaining elegantly simple.
Start by applying two coats of your favorite fuchsia polish as your base. Once dry, you’ll use a dotting tool or toothpick to add small white dots across your nails. Space them randomly for a natural, effortless appearance—you don’t need precision here.
This design works beautifully because it balances boldness with restraint. The fuchsia delivers romance and confidence, while the white dots prevent the look from feeling overwhelming. You can customize the dot placement on each nail, making it uniquely yours.
The best part? You’ll finish this manicure in minutes, and it’ll last beautifully throughout your Valentine’s celebrations.
Baby Pink Base With Tiny Floral Patterns
A soft baby pink base paired with delicate floral patterns creates an effortlessly romantic Valentine’s look that’s both timeless and feminine. You’ll start by applying two coats of baby pink polish to create a smooth, even foundation. Once dry, you’ll use a thin brush or dotting tool to paint tiny flowers across your nails. Consider incorporating small roses, daisies, or cherry blossoms in white, burgundy, or deeper pink shades. You don’t need perfect precision—subtle imperfections add charm to this design. Space your flowers randomly for a natural, garden-inspired aesthetic. Finish with a glossy topcoat to enhance the romantic feel and protect your design. This approach requires minimal artistic skill while delivering maximum elegance for Valentine’s Day.
Minimalist Black Line Hearts
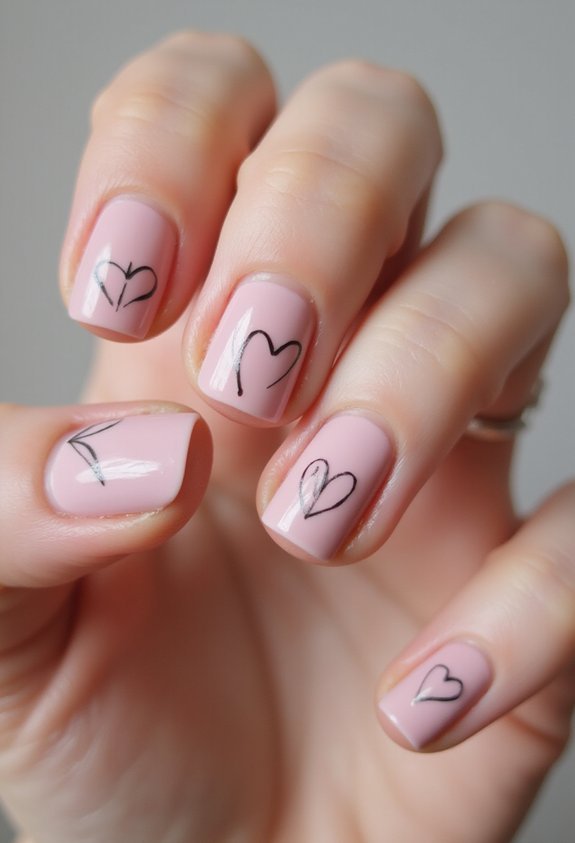
How do you create Valentine’s nail art that’s chic and understated? Minimalist black line hearts offer the perfect solution. Start with a soft pink base coat and let it dry completely. Using a fine black nail brush or thin liner pen, draw simple heart outlines on each nail. You don’t need perfect symmetry—slightly irregular hearts add character and authenticity.
Space them strategically across your nails, leaving plenty of negative space. Some nails can feature a single heart, while others display multiple smaller ones. The contrast between the delicate pink and crisp black lines creates visual impact without overwhelming your fingertips.
This design works beautifully on short or long nails and requires minimal artistic skill. Top with a glossy finish for a polished appearance. You’ll achieve sophisticated Valentine’s nails in minutes.
Nude Pink With Negative Space Heart Cutouts
While minimalist line work offers understated elegance, you can push Valentine’s nail art further with negative space designs. This technique creates striking heart cutouts by leaving bare nail exposed against a nude pink base.
Start by applying two coats of soft nude pink polish to create your canvas. Once dry, use a thin nail art brush or dotting tool to carefully outline heart shapes. Fill these outlines with a matte top coat or leave them completely bare for maximum contrast.
The beauty of negative space designs lies in their simplicity and impact. Your natural nail becomes the focal point, creating visual interest without excessive decoration. This approach works perfectly for Valentine’s Day while maintaining an elegant, sophisticated appearance that’s suitable for any occasion.
Pastel Pink Ombre From Light To Deep Rose
If you’re seeking color depth without sacrificing softness, an ombre gradient from light pastel to deep rose delivers exactly that. This technique works beautifully on short or long nails and requires just two polish shades.
Start by applying a base coat, then paint your entire nail with the lightest pastel pink. While it’s still wet, dab the deeper rose shade onto your nail tip using a makeup sponge. Gently blend where the colors meet by dabbing repeatedly until you achieve a seamless transition.
The gradient creates dimension and sophistication with minimal effort. You can apply this ombre to all ten nails for a cohesive look or alternate between solid colors for variety. Seal everything with a glossy top coat for durability and shine.
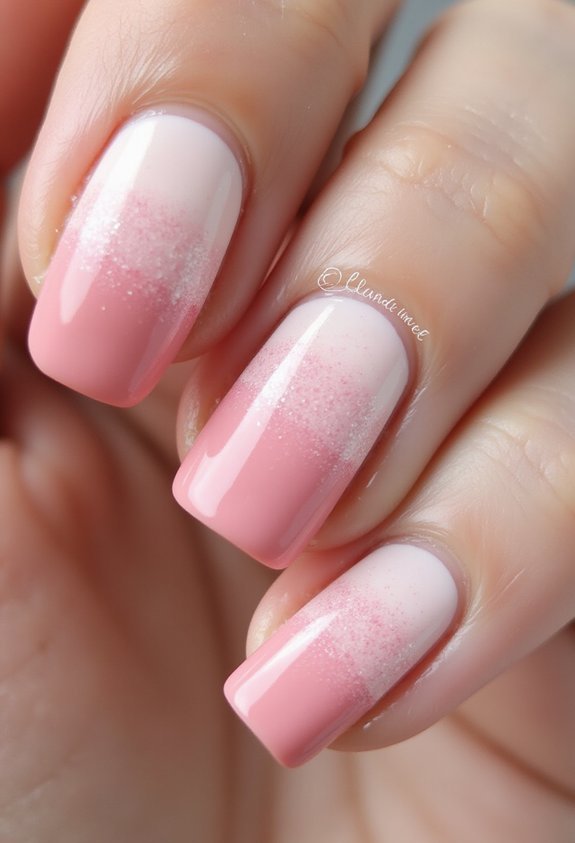
Glitter Gradient Transitioning To Nude Base
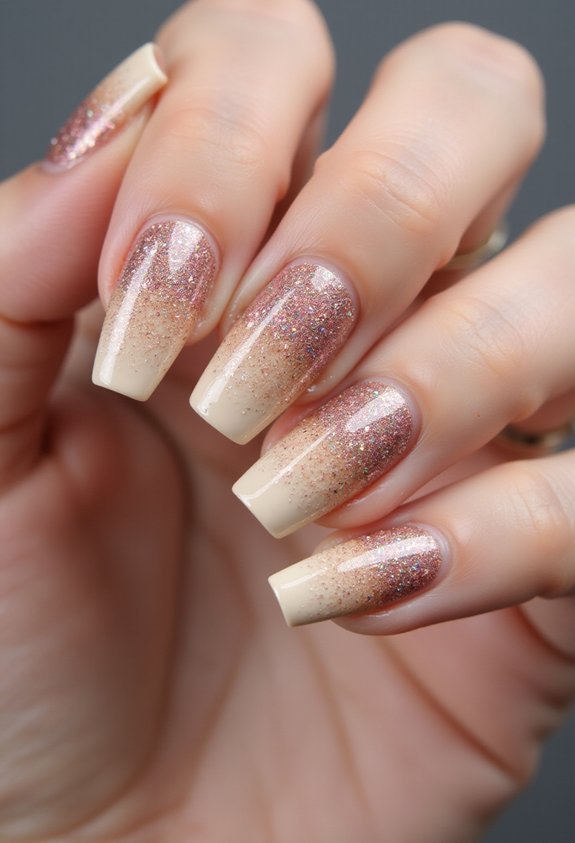
For a sophisticated Valentine’s Day look that balances sparkle with elegance, you’ll want to try a glitter gradient that transitions from a shimmering tip to a clean nude base.
Start by applying two coats of nude polish as your foundation. Once dry, apply a clear topcoat and while it’s still wet, sprinkle fine rose gold or pink glitter onto your nail tips. Let it set, then seal everything with a glossy topcoat.
For a more blended effect, use a makeup sponge to dab glitter polish directly onto your nails, concentrating the color at the tips and fading toward the base. This creates a seamless gradient without harsh lines.
You’ll achieve a refined, romantic manicure that’s perfect for Valentine’s Day while keeping the application process straightforward and achievable at home.
Soft Pink Watercolor Bleed Effect
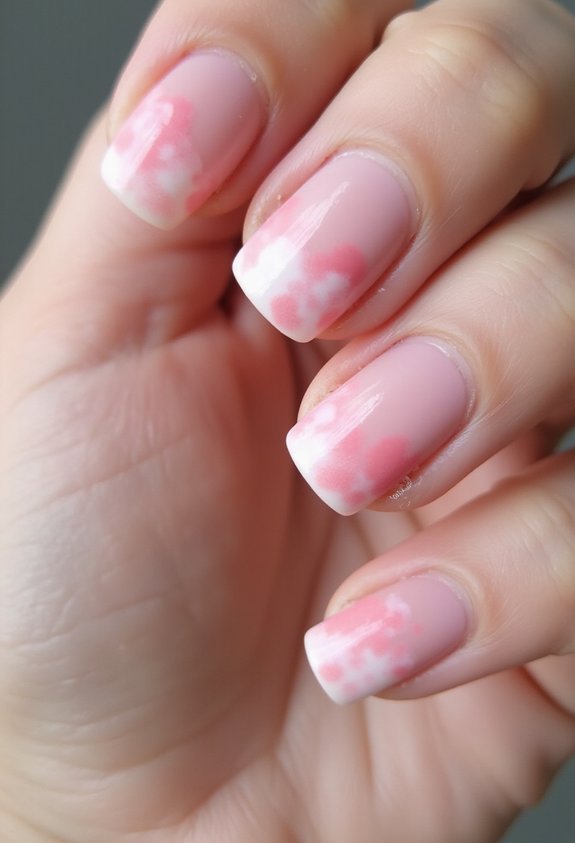
Ready to explore a more artistic approach? The soft pink watercolor bleed effect brings an ethereal quality to your Valentine’s nails. You’ll start by applying a white or pale pink base coat and let it dry completely. Next, you mix pink nail polish with a clear topcoat to create a translucent consistency. Using a thin brush or sponge, you dab this mixture onto your nail, allowing it to naturally spread and blend at the edges. The key is working quickly before it sets. You can layer multiple shades of pink to deepen the effect, creating soft gradients that resemble watercolor painting. Seal everything with a glossy topcoat for protection and shine. This design requires minimal precision, making it perfect for home application.
Pink And White Marble Swirl
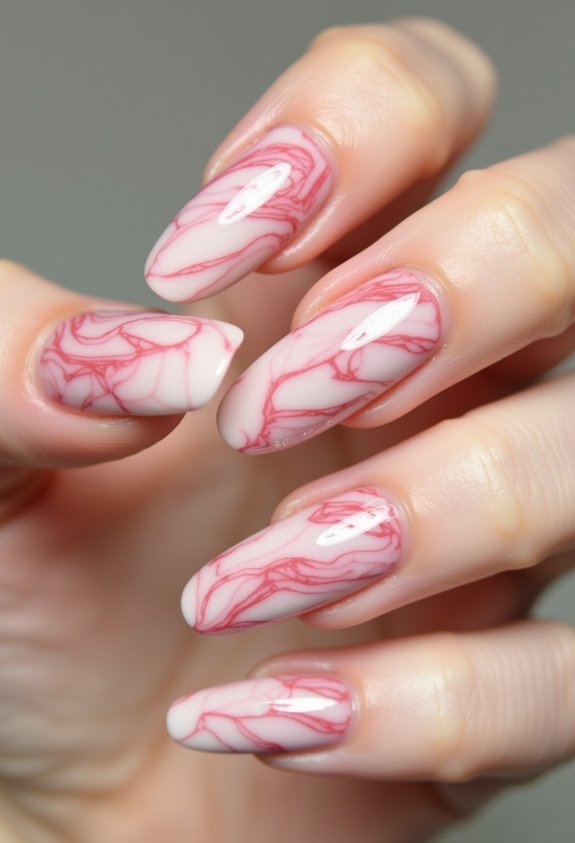
While the watercolor effect relies on soft diffusion, the pink and white marble swirl demands more deliberate control and striking contrast. You’ll create this design by swirling two distinct colors together before they dry completely.
Start by applying a white base coat, then paint thick strokes of pink polish across your nail. Using a thin brush or toothpick, drag through the colors in sweeping motions to create veining patterns. Work quickly since the polish dries fast.
The key to success is maintaining crisp lines while blending the colors just enough. You can experiment with different swirl directions—some prefer diagonal patterns, while others favor organic, flowing waves. Seal everything with a glossy top coat to enhance the marble effect and protect your design.
Gradient Pink To White With Scattered Rhinestones
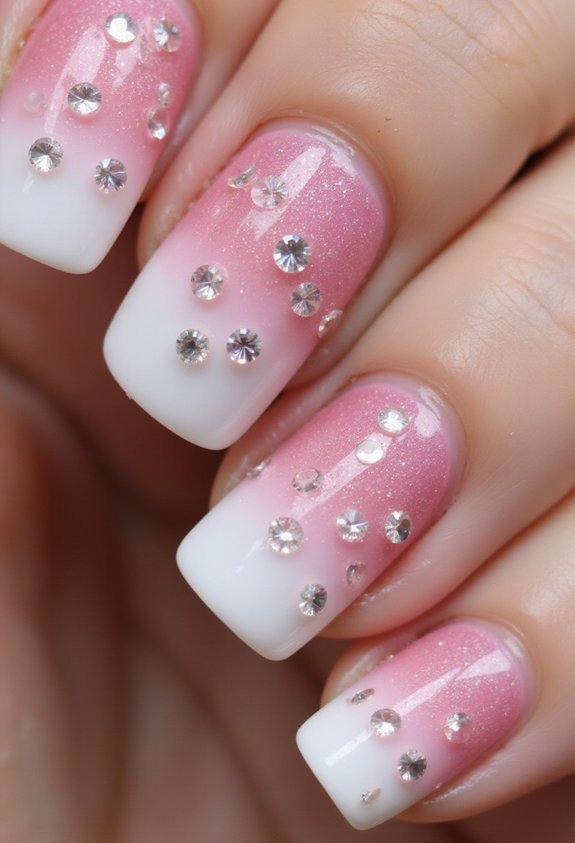
This elegant design shifts seamlessly from soft pink to pure white, creating a sophisticated ombré effect that you’ll enhance with strategically placed rhinestones. You’ll start by applying a base coat, then blend pink polish from your nail’s base toward the tips using a sponge, gradually introducing white for that gradient transition.
Once your base dries completely, you’ll strategically place rhinestones across the gradient to catch light and add dimension. Focus on clustering them toward the white tips or scattering them randomly for visual interest. You’ll use a dotting tool or tweezers to position each stone precisely, ensuring they adhere properly with nail glue.
This design works beautifully for Valentine’s Day because it balances elegance with subtle sparkle. You can customize rhinestone placement and density based on your preference, making it uniquely yours while maintaining that refined aesthetic.
Pink And White Striped Candy Cane Design
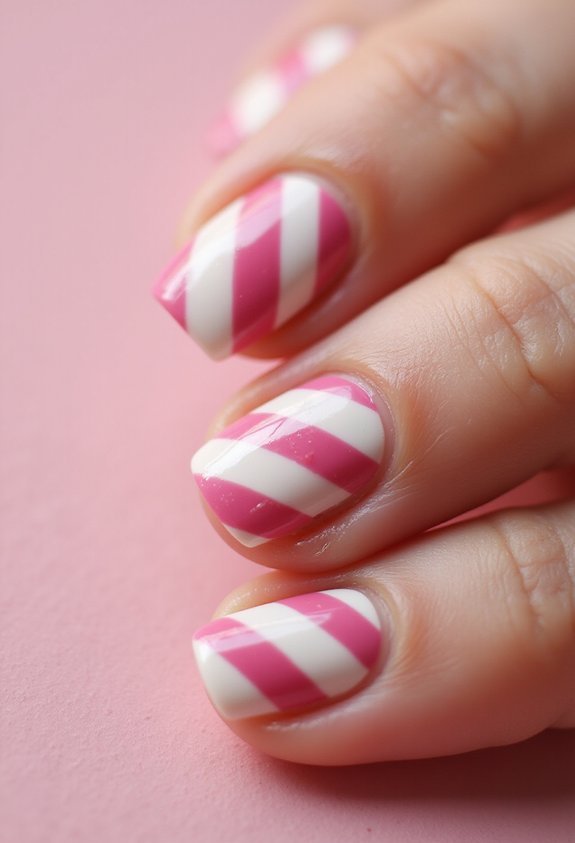
If you’re seeking a festive yet romantic design, pink and white stripes create the perfect candy cane effect for Valentine’s Day nails.
Start with a white base coat and let it dry completely. Then create your striped pattern using these steps:
- Apply thin pink lines diagonally across each nail using a striping brush
- Alternate between pink and white stripes for visual balance
- Angle the stripes at 45 degrees for an authentic candy cane appearance
- Use steady hand pressure to maintain consistent stripe width throughout
- Seal everything with a glossy top coat for protection and shine
This design works beautifully on short or long nails. The candy cane effect adds playful charm while maintaining Valentine’s elegance. You’ll achieve professional results with minimal effort, making this design perfect for at-home manicures.
Hot Pink French Tips With Romantic Twists
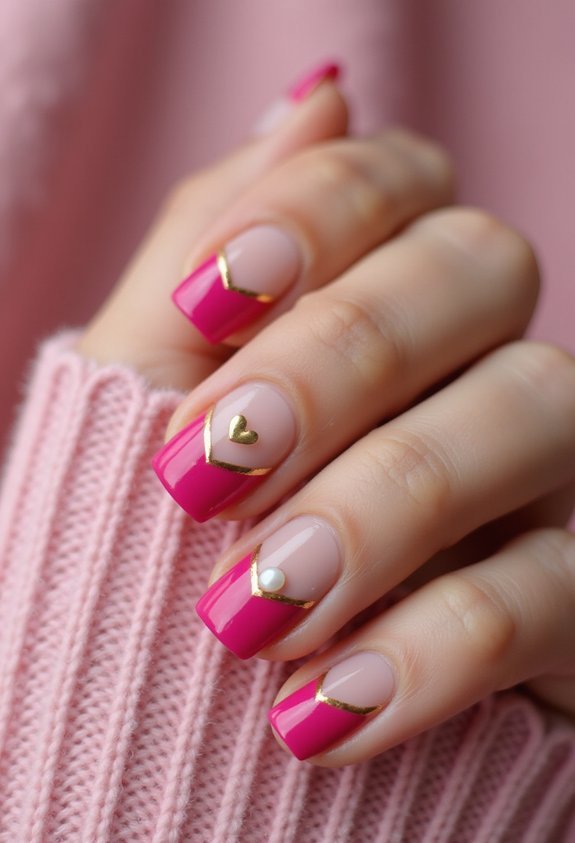
You’ll elevate the classic French manicure by swapping traditional white tips for vibrant hot pink and adding delicate romantic details. Start by applying a nude or pale pink base coat to your nails, then carefully paint the tips with hot pink polish using a steady hand or nail guide strips for clean lines.
Once dry, personalize each nail with tiny romantic accents. Paint small hearts along the tip edge, add delicate gold leaf designs, or create thin rose outlines. You might also incorporate glitter gradients that fade from the hot pink tips into your base color.
Seal everything with a glossy top coat for shine and protection. This design strikes the perfect balance between elegant and playful, making it ideal for Valentine’s Day celebrations or romantic occasions.
Pink And Red Two-Tone Half Moons
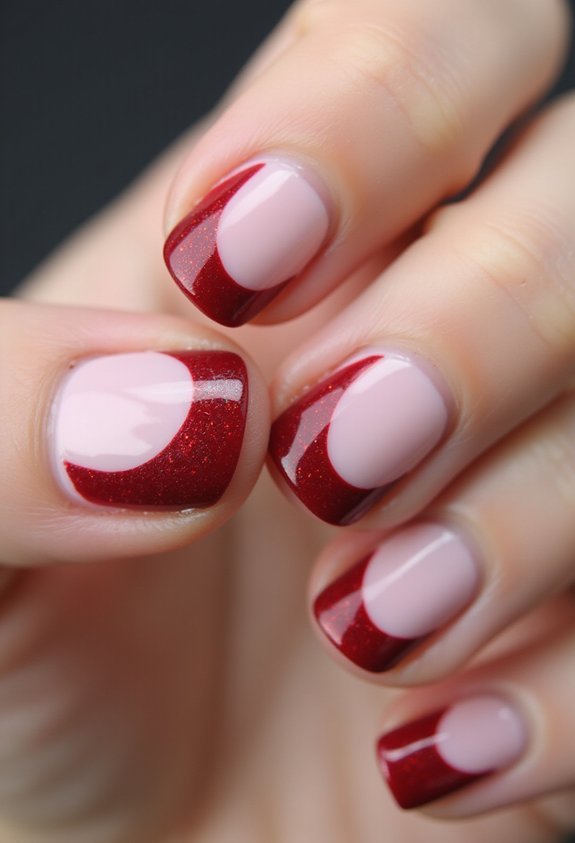
For a bold yet romantic look, half-moon designs featuring pink and red create striking visual contrast on your nails. You’ll love how this two-tone approach combines passion with elegance, making it perfect for Valentine’s Day.
To recreate this design at home, you’ll need:
- A nude or pale pink base coat for your entire nail
- Bright red polish for the half-moon shape at the nail’s base
- Hot pink polish for the upper half section
- A curved nail stencil or steady hand for precision
- A top coat to seal your design
Simply apply your base color first, then use the stencil to create clean half-moon sections with your red and pink shades. The contrast between the warm tones makes your fingertips appear longer and more elegant. This design works beautifully on any nail length.
Pink Chevron Stripes With Glossy Finish

While half-moons offer bold contrast, chevron stripes bring dynamic movement to your Valentine’s Day nails. You’ll love how this pattern creates visual interest without overwhelming your fingertips.
Start with a pink base coat and let it dry completely. Using a thin striping brush or nail art pen, you’ll draw diagonal lines across each nail in alternating directions to form the chevron pattern. Work methodically to keep your lines straight and evenly spaced.
Once your design sets, seal everything with a glossy topcoat. This finish amplifies the stripes’ vibrancy and gives your nails a professional, polished appearance. The shine reflects light beautifully, making the chevrons pop.
You’ll find this design strikes the perfect balance between romantic and modern, making it ideal for Valentine’s Day while remaining versatile enough for everyday wear.
Valentine’s Day Color Block In Pink And Burgundy
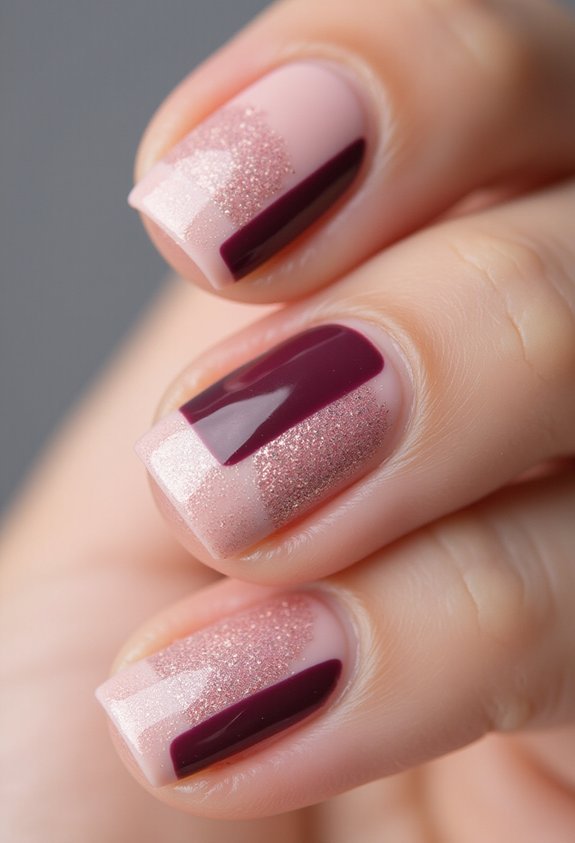
Color blocking offers a striking geometric approach to Valentine’s Day nails that’s bolder than the previous chevron design. You’ll create distinct sections of pink and burgundy that command attention with their clean lines and contrasting hues.
To achieve this look, you’ll need:
- Two complementary nail polish shades—soft pink and deep burgundy
- A thin striping brush or nail art pen for precision
- Base coat to protect your nails
- Top coat for a glossy, professional finish
- Rubbing alcohol to clean brush edges between sections
Start by applying your base coat, then map out your color blocks using a pencil. Paint alternating sections with each shade, keeping borders sharp. You’ll want to use steady strokes and let each layer dry completely before adding the next. This design works beautifully on any nail length and demands minimal advanced techniques while delivering maximum impact.
Dusty Rose With Gold Foil Flecks

If you’re seeking a more romantic and sophisticated approach to Valentine’s Day nails, dusty rose with gold foil flecks delivers effortless elegance. This muted pink shade pairs beautifully with shimmering gold accents, creating a luxurious aesthetic that’s surprisingly easy to achieve.
Start by applying two coats of dusty rose polish as your base. Once dry, you’ll scatter gold foil flecks across your nails using a thin brush or toothpick. You can apply them randomly for an organic look or create deliberate patterns. Seal everything with a glossy top coat to protect the foil and enhance the shine.
This design works wonderfully for both short and long nails, and the neutral palette complements any skin tone. The result? Sophisticated nails that look professionally manicured without requiring extensive effort or advanced techniques.
Matte Pink With Shiny Chrome Accent Nails
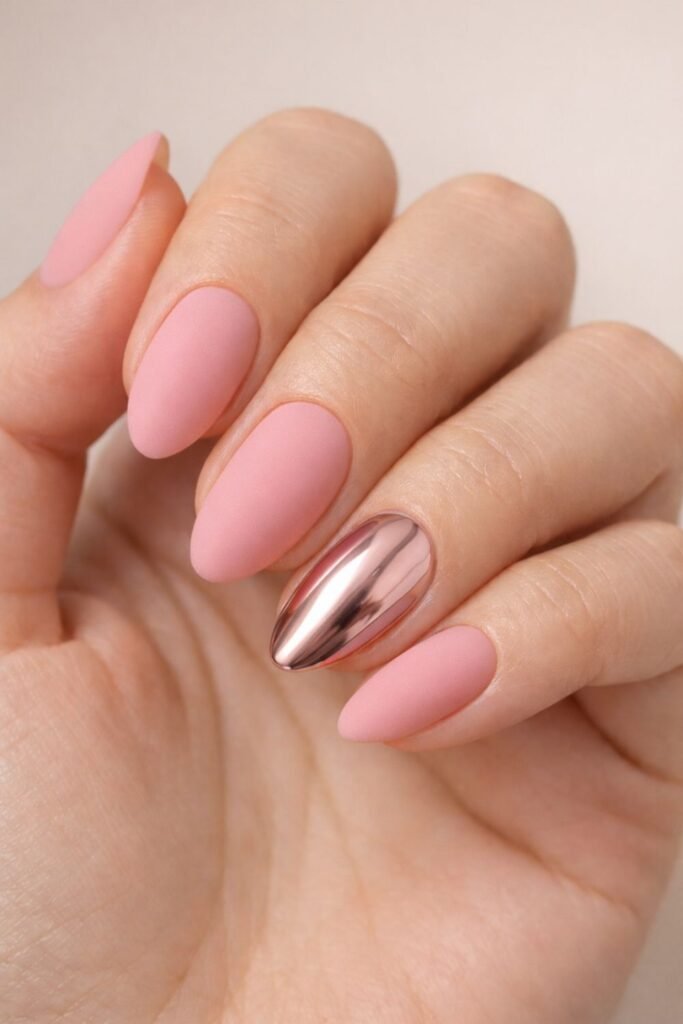
For a modern twist on Valentine’s Day glamour, pair a matte pink base with shiny chrome accents on select nails. This design balances soft femininity with edgy sophistication, creating visual interest through contrasting textures.
Here’s how you’ll achieve this look:
- Apply two coats of matte pink polish to all nails
- Let the base dry completely before adding accents
- Use chrome powder on your ring and pinky fingers for maximum impact
- Apply a clear topcoat over chrome nails to seal the effect
- Consider adding thin gold lines between matte and chrome sections for extra detail
The matte finish feels velvety and refined, while chrome catches light dramatically. You’ll love how this combination works for both casual outings and romantic dinners. The contrast makes each nail pop without overwhelming your fingertips.
Mauve Pink With Delicate Silver Starburst Design
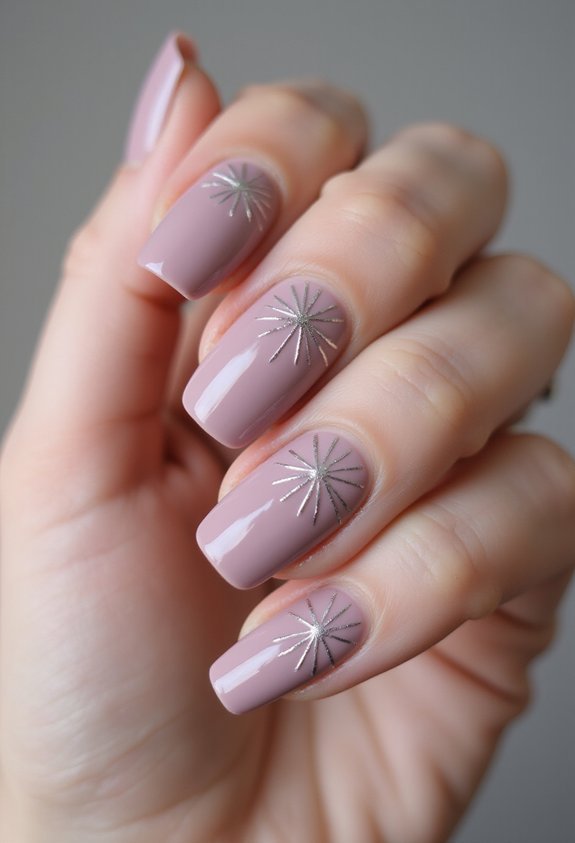
While chrome accents bring bold drama to your Valentine’s look, softer metallics offer an equally enchanting alternative. Mauve pink with delicate silver starburst designs delivers understated elegance that’s perfect for the occasion.
Start by applying two coats of mauve pink polish as your base. Once dry, you’ll use a thin brush or dotting tool to create silver starbursts across your nails. Begin with a central dot, then draw four to six lines radiating outward, forming a classic starburst pattern.
Space these designs strategically—perhaps one per nail or clustered on your accent finger. The mauve tone provides a romantic backdrop that won’t compete with the silver accents.
This design requires minimal skill, making it ideal for home application. The soft color combination ensures your nails look sophisticated and Valentine’s-ready without appearing overdone.
Light Pink With All-Over Confetti Specks
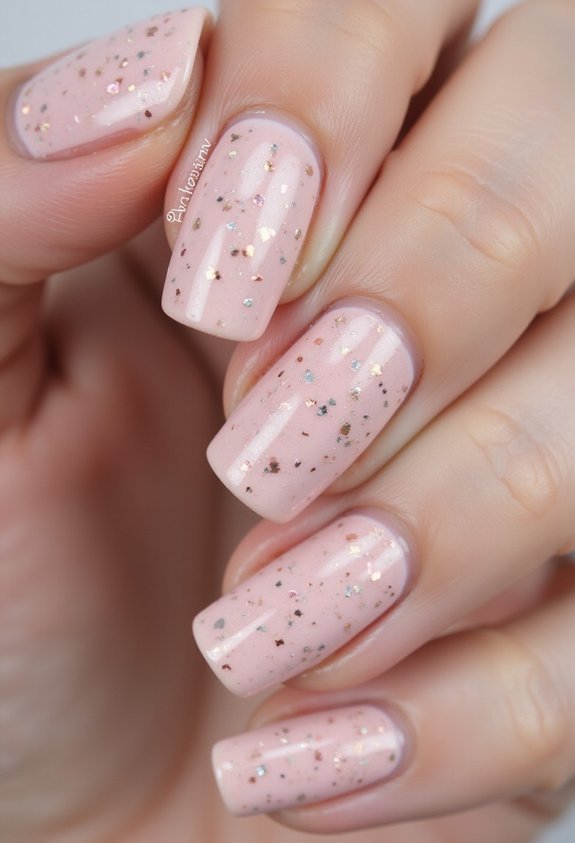
Should you prefer a playful yet polished Valentine’s aesthetic, light pink with all-over confetti specks delivers festive charm without sacrificing sophistication.
This design combines elegance with fun, making it perfect for the holiday. You’ll create dimension by layering multiple colors across your base coat.
Here’s what you’ll need:
- Light pink or blush base polish
- Fine glitter in gold, silver, or multicolored finishes
- Small confetti pieces or sequins
- Clear top coat for sealing
- Thin brush for precise application
Start by applying two coats of your light pink base. Once dry, sprinkle confetti specks randomly across each nail, pressing gently to secure them. Layer smaller glitter particles between larger pieces for visual interest. Finish with a glossy top coat to protect your design and create a smooth surface. The result? A Valentine’s manicure that’s effortlessly chic and undeniably festive.
Playful Pink Polka Dot Design
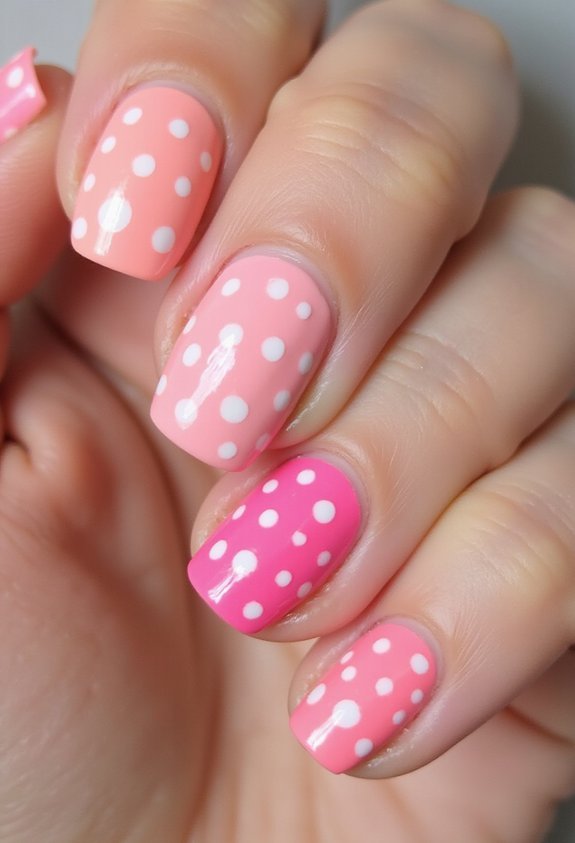
If confetti feels too chaotic for your taste, polka dots offer a cleaner yet equally playful Valentine’s look. You’ll start with a soft pink base coat as your foundation, then let it dry completely. Using a dotting tool or bobby pin, you’ll create evenly spaced dots across your nail in contrasting colors—white, red, or darker pink all work beautifully. You can scatter dots randomly for a whimsical feel or arrange them in deliberate patterns for sophistication. The key is maintaining consistent dot sizes and spacing. This design works wonderfully on shorter nails and requires minimal precision compared to other techniques. You’ll achieve professional-looking results in minutes, making it perfect for last-minute Valentine’s preparations.
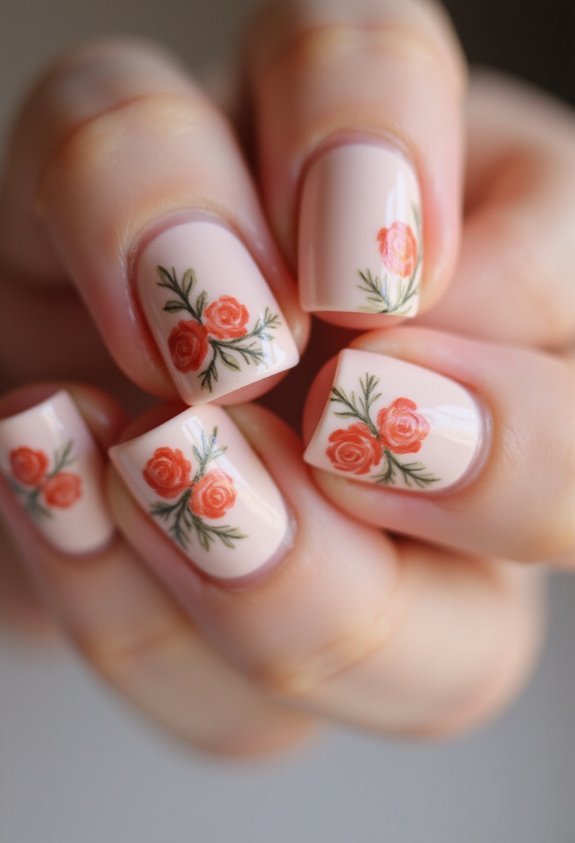
Transparent Pink With Hand-Painted Cherry Blossoms
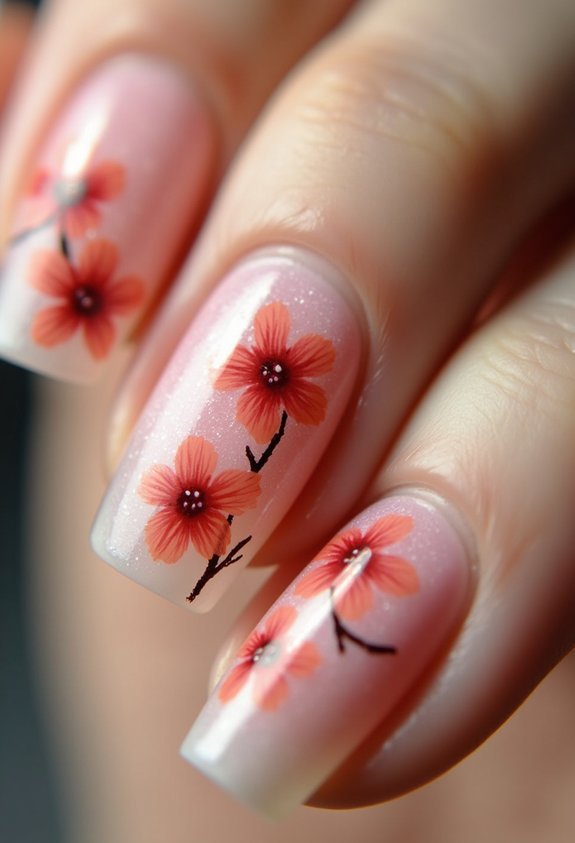
For a more delicate and sophisticated Valentine’s look, you’ll layer transparent pink polish with hand-painted cherry blossoms. This design combines elegance with romantic charm, perfect for the holiday.
Here’s what you’ll need:
- Sheer pink base polish for a subtle foundation
- Fine detail brush or thin nail art brush for precision
- White or soft pink acrylic paint for blossoms
- Clear top coat to seal your design
- Toothpick for creating small petals and details
Start by applying two coats of transparent pink to your nails. Once dry, use your detail brush to paint delicate cherry blossom clusters across each nail. Add tiny dots for flower centers using a toothpick. Finally, apply clear top coat for protection and shine. This design works beautifully on natural or slightly extended nails.
Coral Pink With Metallic Rose Gold Drip Details
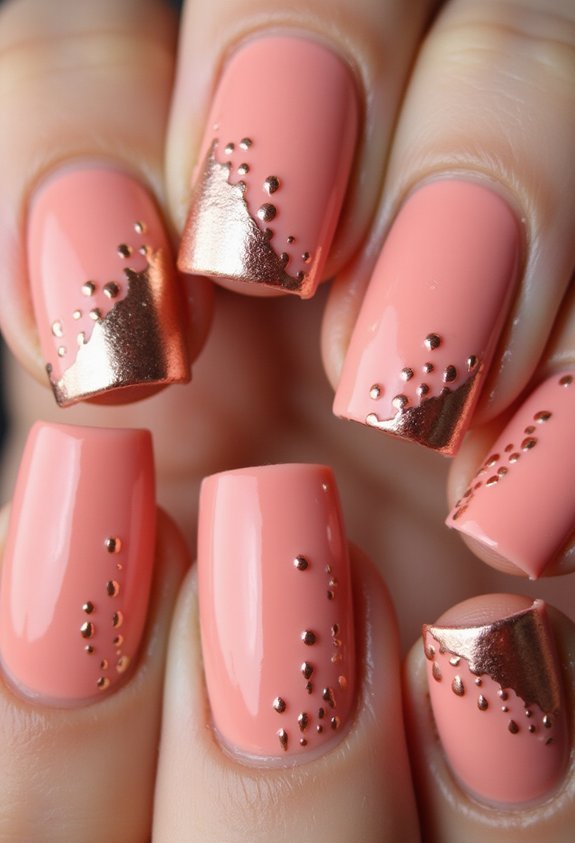
Transform your nails with a striking coral pink base paired with luxurious rose gold drips that’ll catch the light beautifully. This design combines warmth and elegance, making it perfect for Valentine’s Day.
Start by applying two coats of your coral pink polish as the foundation. Once dry, you’ll create the drip effect using rose gold metallic polish. Load a thin brush or nail art pen with the metallic shade, then draw vertical lines from your nail’s top edge downward. Let gravity work naturally for an organic drip appearance, or guide the lines deliberately for precision.
The contrast between coral and rose gold creates dimension while remaining romantic. You can customize the drip intensity—cover half your nail or just add accent strokes on your ring finger. Seal everything with a glossy top coat to enhance the metallic shimmer and protect your work.
Conclusion
You’ve discovered dozens of delightful designs that’ll dazzle this Valentine’s Day. Whether you’re drawn to bold fuchsia or soft, subtle shades, you’ll find the perfect polish palette for your personalized manicure. These easy-to-execute designs don’t demand professional polish prowess—you can create captivating, charming nails right at home. From minimalist lines to watercolor wonders, you’ve got gorgeous options galore. Pick your preferred pattern, grab your tools, and get painting. Your Valentine’s Day nails will be nothing short of magnificent.