Creating art this Valentine’s Day weekend is a wonderful way to unwind, express yourself, and produce beautiful pieces for your home or as gifts. Easy projects mean you don’t need experience or special training to achieve impressive results. Whether you prefer painting, drawing, crafting, or mixed media, there’s a perfect project waiting to inspire your creative weekend.
Art projects become more enjoyable when they match your skill level and interests while offering just enough challenge to keep you engaged. Using materials you already have at home makes these projects accessible and budget-friendly without compromising on final results. The satisfaction of completing an art project you created from start to finish brings genuine pride and joy.
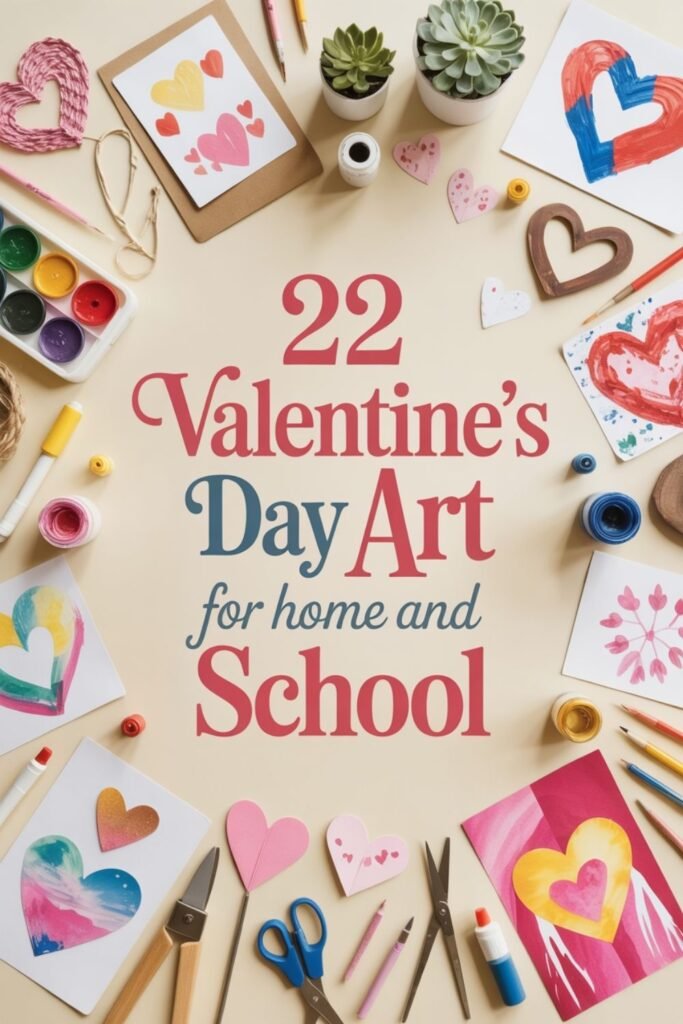
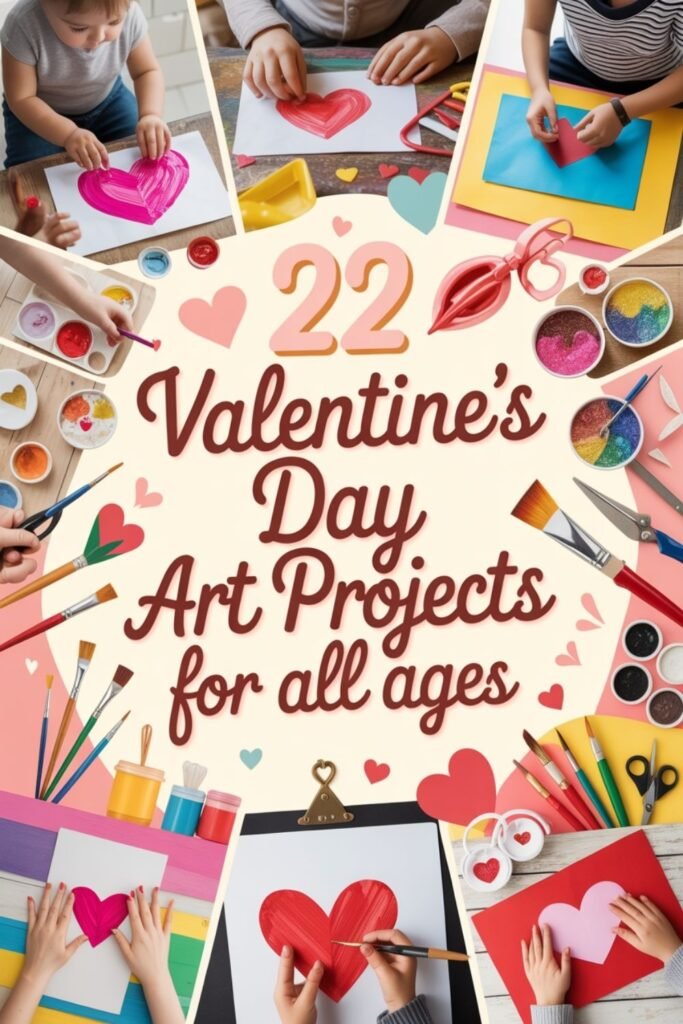
In this guide, I’ve compiled twenty-two easy Valentine’s Day art projects ideal for a creative weekend. Each project includes simple steps and uses basic supplies to help you succeed. Whether you’re decorating your home, creating gifts, or simply enjoying a relaxing artistic weekend, these projects offer endless possibilities for expressing love through art.

Paper Heart Garland With Watercolor Details
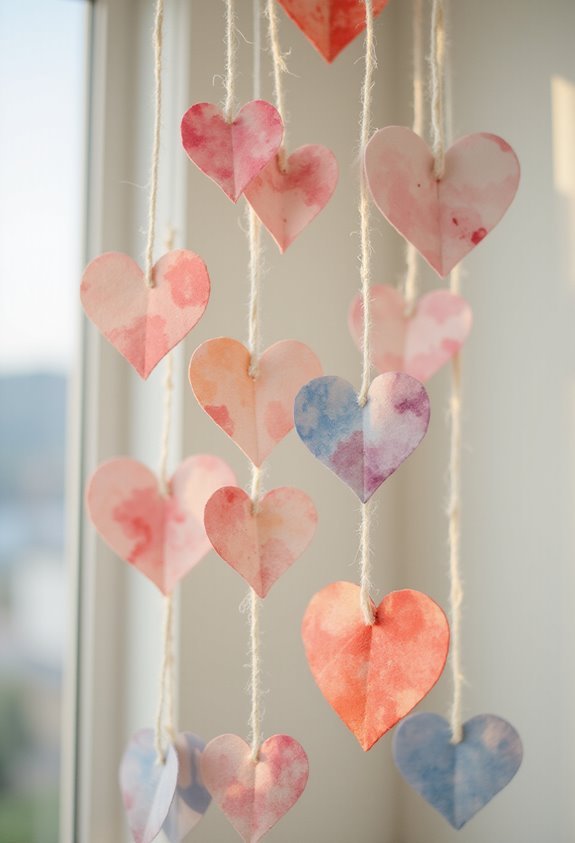
If you’re looking for a simple yet elegant Valentine’s Day decoration, you’ll love creating a paper heart garland with watercolor details. Start by cutting various heart shapes from watercolor paper. Paint each heart with soft, romantic hues—blush pink, deep red, or lavender work beautifully. Let the colors blend naturally for an organic, artistic effect.
Once the paint dries completely, punch a hole at the top of each heart. Thread twine or ribbon through the holes, spacing them evenly along the strand. Arrange your garland across a mantelpiece, window frame, or bedroom wall for instant festive charm.
This project requires minimal supplies and takes just an afternoon to complete. The results are stunning and personalized, making it perfect for decorating your home or gifting to someone special.
Also read: 19 Valentine’s Day Night Outfit Ideas You’ll Love
Hand-Lettered Love Notes on Cardstock
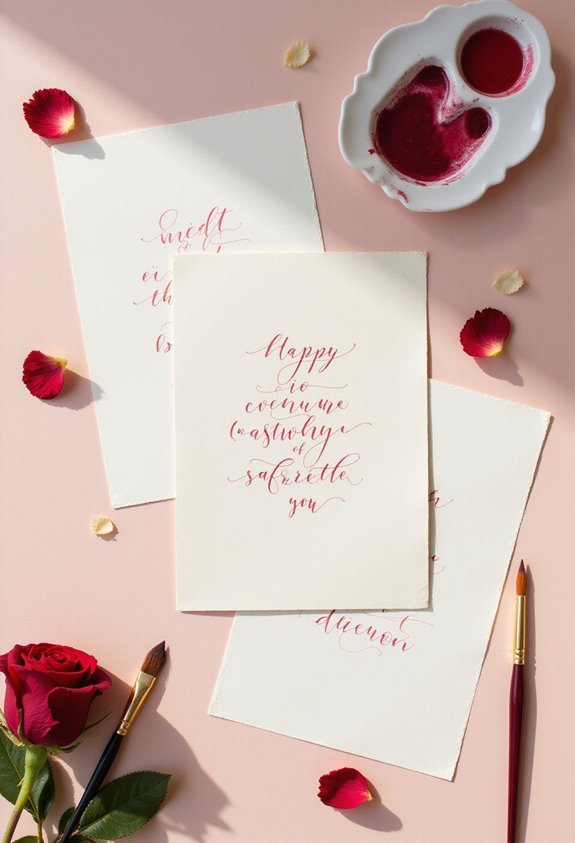
While a decorative garland brings visual warmth to your space, hand-lettered love notes add a personal, heartfelt touch that speaks directly to someone’s soul. You’ll need cardstock, markers, and a steady hand to create these meaningful pieces.
Start by selecting cardstock in colors that complement your message—soft pastels work beautifully for romantic sentiments. Sketch your lettering lightly in pencil first, then trace over it with your chosen markers. Experiment with different styles: flowing cursive, bold block letters, or playful script.
Include meaningful quotes, inside jokes, or simple declarations of affection. You can embellish your notes with small doodles, watercolor accents, or decorative borders. These handwritten cards make perfect gifts, table settings, or keepsakes your loved ones’ll treasure long after Valentine’s Day passes.
Fingerprint Love Birds Canvas
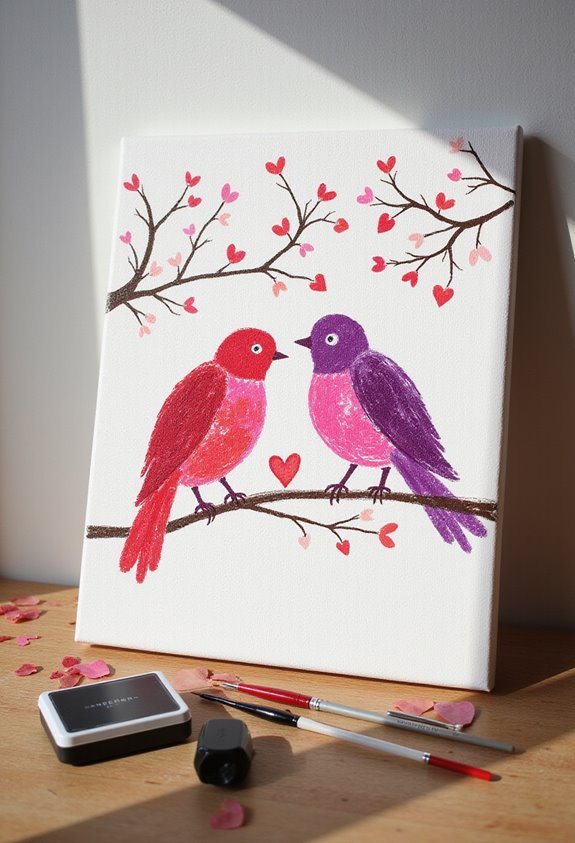
For a project that combines simplicity with charm, fingerprint love birds offer an adorable way to create meaningful canvas art. You’ll need a small canvas, washable ink pads in reds and pinks, and a fine-tip black marker.
Start by pressing your fingertips onto the ink pad, then onto the canvas to create bird shapes. You can make them face each other or perch on a branch. Once the ink dries, use your marker to draw tiny details—beaks, eyes, feet, and delicate branches.
This project works wonderfully for couples or as a heartfelt gift for someone special. The personal touch of your fingerprints adds genuine sentiment to the finished piece. Display it proudly on a shelf or wall.
Paint-by-Numbers Heart Design
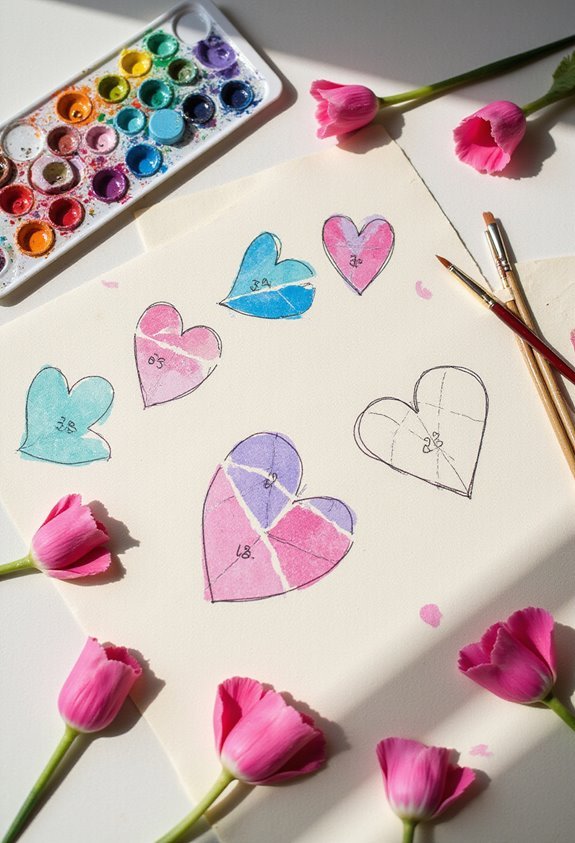
When you’re seeking a relaxing yet satisfying Valentine’s craft, paint-by-numbers heart designs deliver instant gratification. You’ll find these kits at craft stores or online, featuring pre-drawn hearts divided into numbered sections.
Start by organizing your paints and brushes. You’ll match each numbered area to its corresponding color, filling in sections methodically. This methodical approach requires minimal artistic skill, making it perfect for all experience levels.
The beauty of this project lies in its simplicity and meditative quality. You can complete a design in one afternoon while enjoying calming, focused work. Display your finished piece in a frame or give it as a heartfelt gift.
Paint-by-numbers hearts offer accessibility without sacrificing the satisfaction of creating something beautiful and personally meaningful.
Folded Paper Origami Hearts
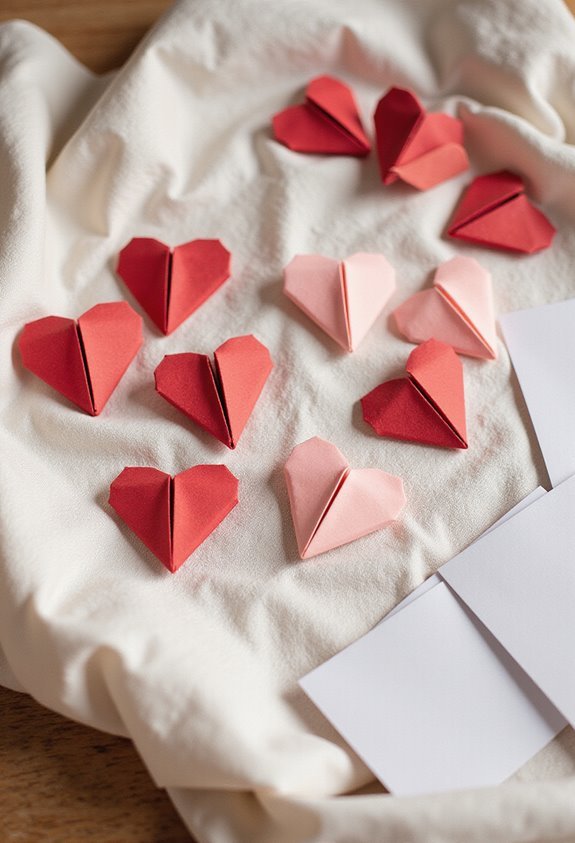
If you’d prefer a craft that requires no paint or brushes, origami hearts offer an equally rewarding alternative. You’ll need just colored paper and basic folding skills to create stunning decorative pieces.
Start with a square sheet of paper and fold it diagonally, then unfold. Fold the top corners down to meet the center crease, creating a pointed shape. Fold the bottom point upward, then fold the sides inward to form curves. Finally, fold the tip down slightly to complete the heart’s distinctive notch.
These origami hearts work beautifully as gift toppers, garland decorations, or card embellishments. You can customize them using patterned paper, metallic finishes, or glitter for extra flair. The simple technique makes this project perfect for crafters of all skill levels.
Watercolor Tissue Paper Art
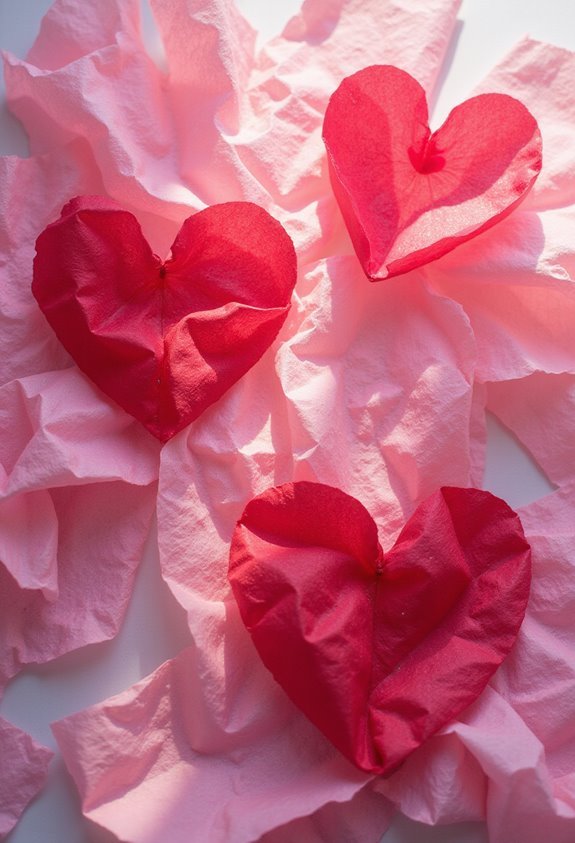
Combining watercolor paint with delicate tissue paper creates luminous, translucent artwork that captures Valentine’s Day’s romantic spirit. You’ll need watercolor paints, tissue paper in various colors, white paper, water, and brushes.
Start by painting bold watercolor strokes on your white paper base. While the paint’s still wet, tear tissue paper into shapes—hearts, flowers, or abstract pieces—and press them onto the painted surface. The tissue paper absorbs the moisture and creates beautiful color blending where it overlaps with the watercolor.
As everything dries, the tissue paper becomes transparent, revealing layered hues beneath. You can add more watercolor details around the edges for definition. The result’s a stunning piece with depth and movement that looks professionally crafted yet requires minimal artistic experience.
Watercolor Wash Background Cards
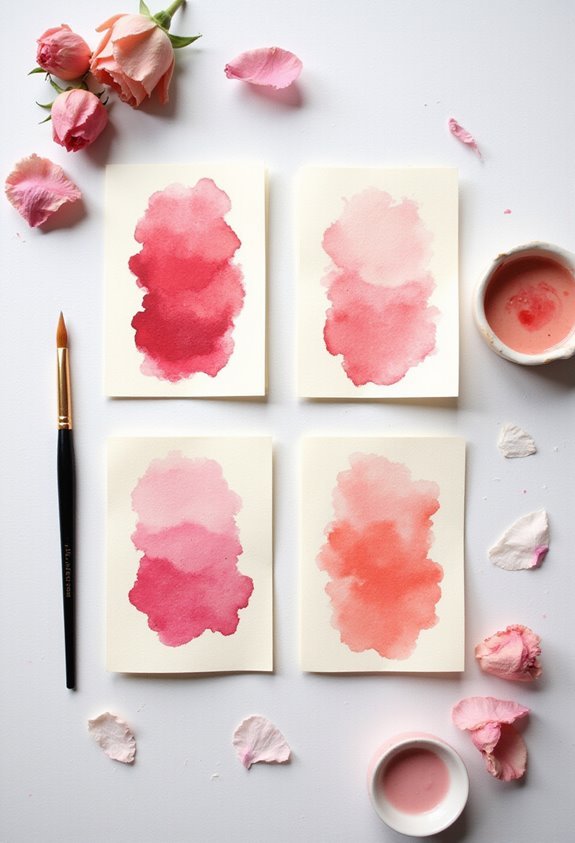
Watercolor washes build up elegant card backgrounds that’ll frame your Valentine’s sentiments beautifully. You’ll start by wetting watercolor paper with clean water, then dropping in your chosen colors—reds, pinks, purples—and letting them blend naturally across the surface. The pigment spreads organically, creating soft gradients without requiring precision.
Once dry, you’ll add your Valentine’s message with calligraphy, hand lettering, or simple typed text. The beauty of this technique lies in its unpredictability; each card becomes uniquely yours. You can tilt the paper to guide color flow or add salt for texture. Layer multiple washes for depth, allowing each layer to dry completely between applications. This straightforward method produces professional-looking cards that impress recipients while remaining achievable for any skill level.
Chalk Pastel Gradient Hearts
While watercolor requires patience for drying layers, chalk pastels let you build vibrant gradient hearts instantly. You’ll start by sketching a heart outline on colored cardstock, then blend multiple pastel shades from dark to light, creating smooth color transitions across the surface.
Use your fingers or a blending stump to smudge the pastels together seamlessly. Layer lighter hues over darker ones for depth and dimension. The beauty of this technique lies in its immediacy—no waiting between steps. You can create several cards in under an hour.
Seal your finished hearts with fixative spray to prevent smudging. This method works wonderfully for personalizing valentines or decorating your space with custom artwork that showcases your color-blending skills.
Ink-Splatter Heart Canvas
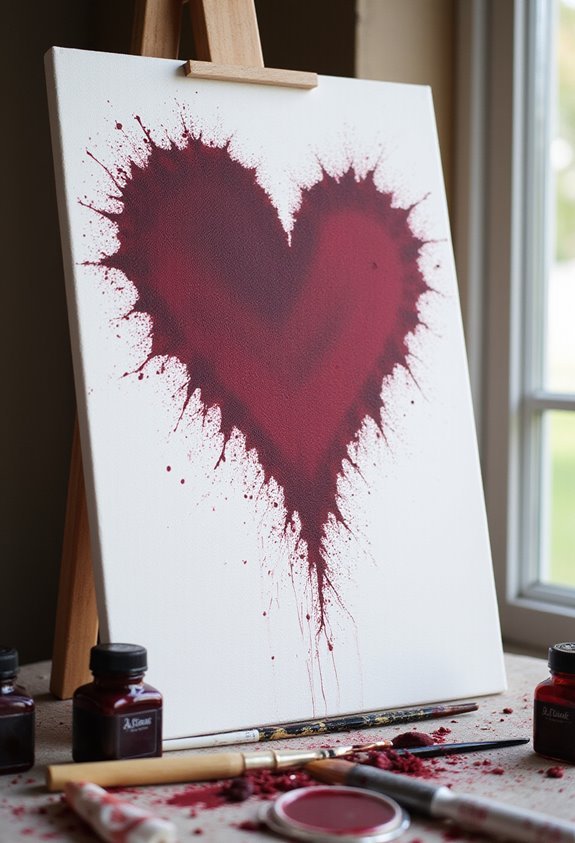
Three simple supplies—black ink, a canvas, and your willingness to embrace controlled chaos—create striking abstract heart art.
You’ll start by sketching a heart outline lightly on your canvas. Then you’ll flick, splatter, and drip ink across the surface using various techniques:
- Dip a toothbrush in ink and flick bristles toward the canvas
- Squeeze ink directly from the bottle for bold, dramatic lines
- Use a straw to blow ink across the surface
- Tap a loaded brush against your finger for fine spatters
- Layer multiple colors for depth and visual interest
You’ll work quickly, letting gravity and momentum guide the ink’s path. This spontaneous approach produces unique, energetic results that photograph beautifully. Once dry, you’ve created gallery-worthy Valentine’s décor that celebrates artistic expression over perfection.
Spray-Painted Stencil Canvas Hearts
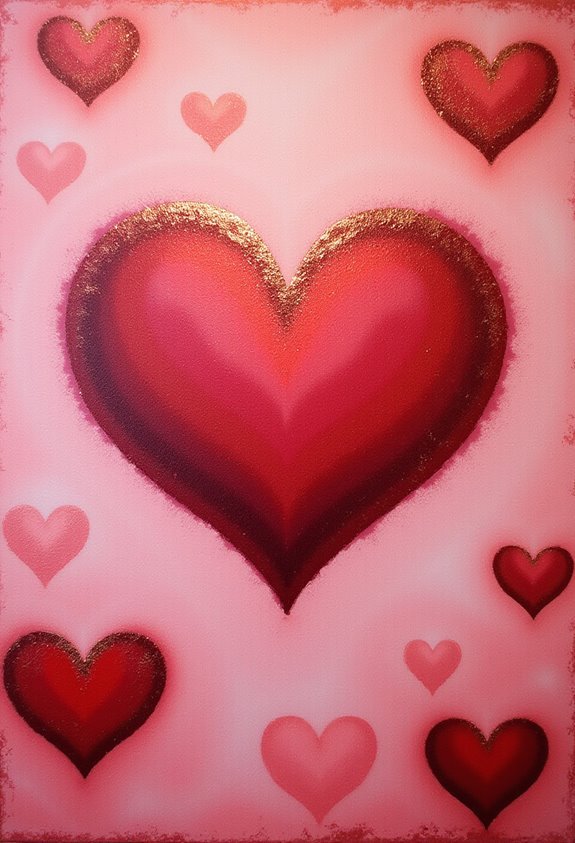
For a cleaner, more graphic approach to Valentine’s art, spray paint and stencils‘ll give you bold, professional-looking results. Start by creating or printing heart stencils in various sizes. Tape them securely onto your canvas to prevent paint seepage. In a well-ventilated area, apply spray paint in thin, even coats, holding the can about six inches away. Let each layer dry before adding another for optimal coverage. You can layer multiple colors—try reds, pinks, and purples for depth. Once dry, carefully remove the stencils to reveal crisp, defined hearts. This technique works wonderfully for creating geometric patterns or abstract designs. The finished pieces look gallery-worthy and make impressive gifts or home décor additions.
Stenciled Love Wall Art
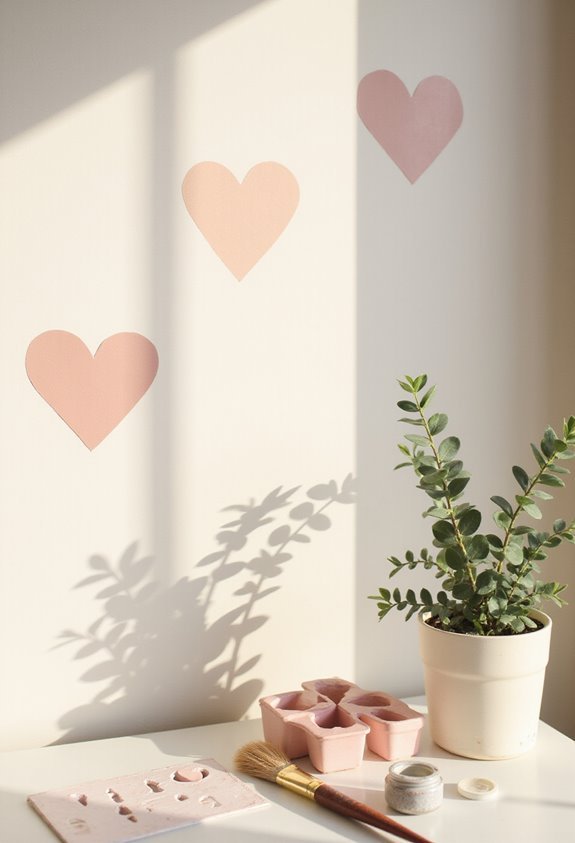
Beyond canvas, you can bring that same spray-painted stencil technique to your walls for a personalized Valentine’s statement. This project transforms your space into a romantic gallery without permanent damage.
Here’s what you’ll need:
- Adhesive stencils or cardstock templates secured with painter’s tape
- Spray paint in reds, pinks, or metallics
- Drop cloth or newspaper for protection
- Light coats of paint applied at 45-degree angles
- Stencil removal after paint dries completely
Start by selecting your wall section—above your bed or entryway works beautifully. Position your stencil securely, then apply thin, even spray paint layers. Multiple thin coats prevent paint seepage and maintain crisp edges. Once dry, carefully peel away your stencil to reveal clean, professional lettering or heart designs.
String Art Heart Wall Piece
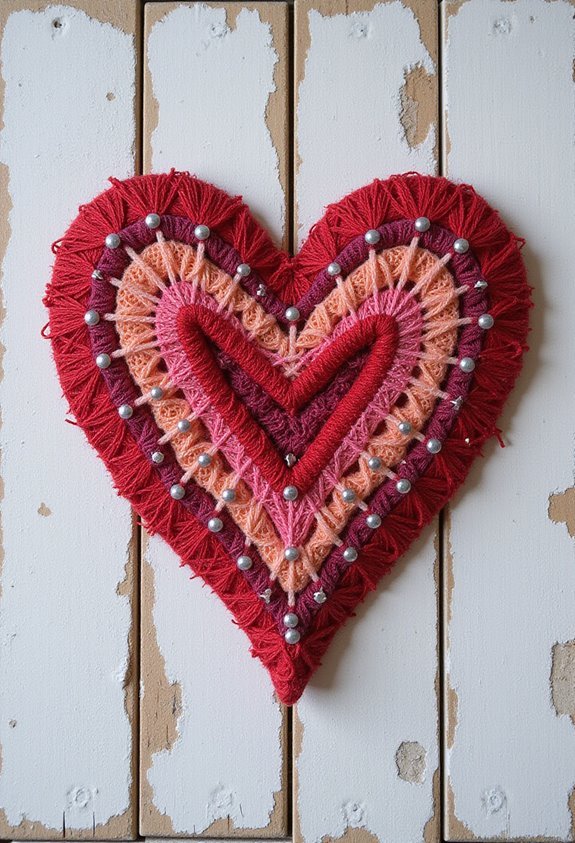
While spray paint offers bold, immediate impact, string art delivers an elegant, tactile alternative that’s equally striking. You’ll create a mesmerizing heart by hammering nails around your wooden board’s penciled outline, then wrapping colorful string between them in crisscross patterns.
Start by sketching your heart shape lightly on plywood or a wooden plank. Space nails roughly half an inch apart around the perimeter, driving them halfway in. Select embroidery thread or yarn in reds, pinks, or metallics that complement your décor.
Tie your string to a nail and begin weaving between points, creating geometric patterns or dense layers. Vary your string colors to add visual depth. This meditative process takes one to two hours, producing sophisticated wall art that catches light beautifully and costs minimal money.
Marbled Paper Gift Wrap and Tags
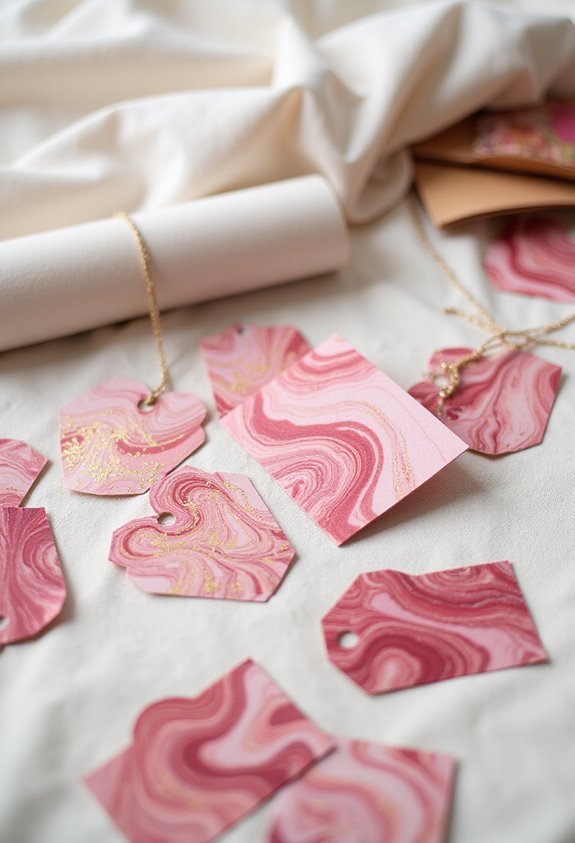
Unlike the geometric precision of string art, marbled paper celebrates organic, fluid patterns that transform ordinary gift wrap into gallery-worthy presentation. You’ll create stunning designs using simple supplies:
- Fill a shallow pan with water and add oil-based marbling paint or nail polish
- Swirl the colors with a stick or comb to form intricate patterns
- Gently lay paper on the surface, then lift carefully to reveal your unique design
- Let the paper dry completely before wrapping your gifts
- Cut smaller sections into custom gift tags with twine attachments
The beauty of marbling lies in its unpredictability. Each piece you create is genuinely one-of-a-kind, making your Valentine’s gifts feel personally crafted. The technique requires minimal skill yet produces professional-looking results that’ll impress recipients.
Collage Mixed-Media Heart Hanging
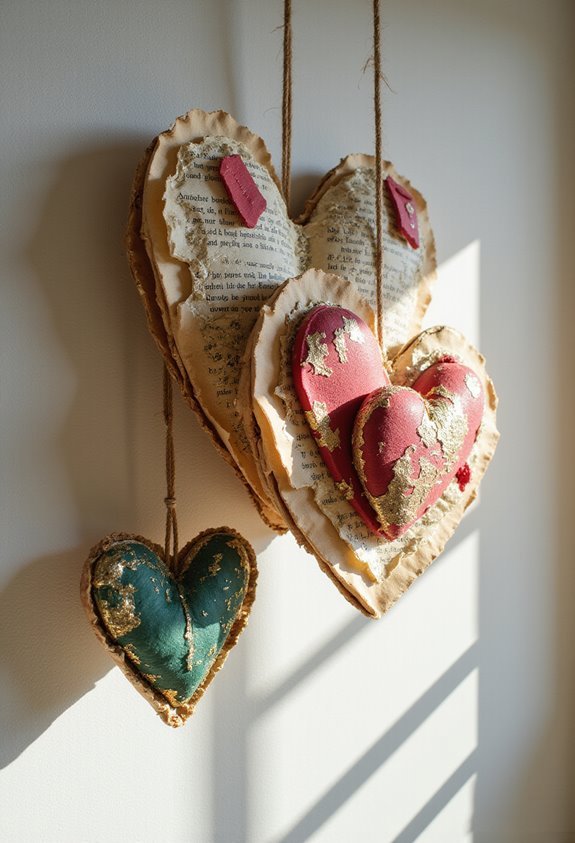
Create a personalized heart hanging by layering photographs, torn magazine pages, fabric scraps, and decorative paper into a compelling visual composition. Start by cutting a heart shape from sturdy cardboard or foam board as your base.
Gather your materials—images of loved ones, colorful magazine clippings, textured fabrics, and patterned papers that resonate with you. Arrange these elements across your heart, overlapping them to create visual interest and depth. You’ll want to experiment with different layouts before committing to glue.
Once satisfied, secure everything with strong adhesive or a glue gun. Add finishing touches like ribbon loops, beads, or metallic accents. This mixed-media approach transforms your heart into a unique, textured artwork that celebrates your personal connections while making an eye-catching decorative piece for your home.
Personalized Photo Collage Board
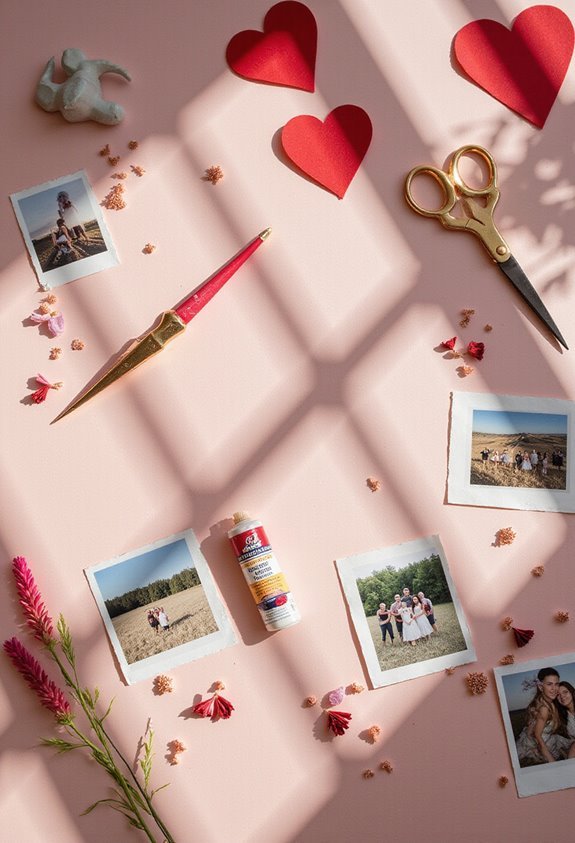
A photo collage board lets you display cherished memories in a dynamic, customizable arrangement. You’ll create a meaningful Valentine’s Day gift that celebrates your relationship.
Here’s what you’ll need:
- Foam board or cork backing as your base
- Printed photos of special moments together
- Decorative elements like ribbons, washi tape, and stickers
- Adhesive suitable for your chosen board material
- Markers or paint for personalized text
Arrange your photos in an appealing layout before adhering them permanently. You can create geometric patterns, heart shapes, or freestyle designs. Add handwritten notes, dates, or sweet messages between photos. Incorporate Valentine’s Day colors like red, pink, and gold through your decorative accents. This project transforms your favorite memories into a beautiful, personalized keepsake that you’ll both treasure.
Pressed Flower Love Cards

While photo collages celebrate memories through images, pressed flower cards bring nature’s delicate beauty into your Valentine’s Day expressions. You’ll start by collecting flowers from your garden or a local park—roses, pansies, and baby’s breath work wonderfully. Place them between newspaper pages and press them under heavy books for one to two weeks until they’re completely flat and dry.
Once ready, arrange your pressed flowers on cardstock in meaningful patterns. You can create a heart shape, a border, or a scattered design. Secure them with acid-free glue to prevent deterioration. Write a heartfelt message inside, and you’ve crafted a unique, eco-friendly card that your recipient will treasure long after Valentine’s Day passes.
Stamped Envelope Liners
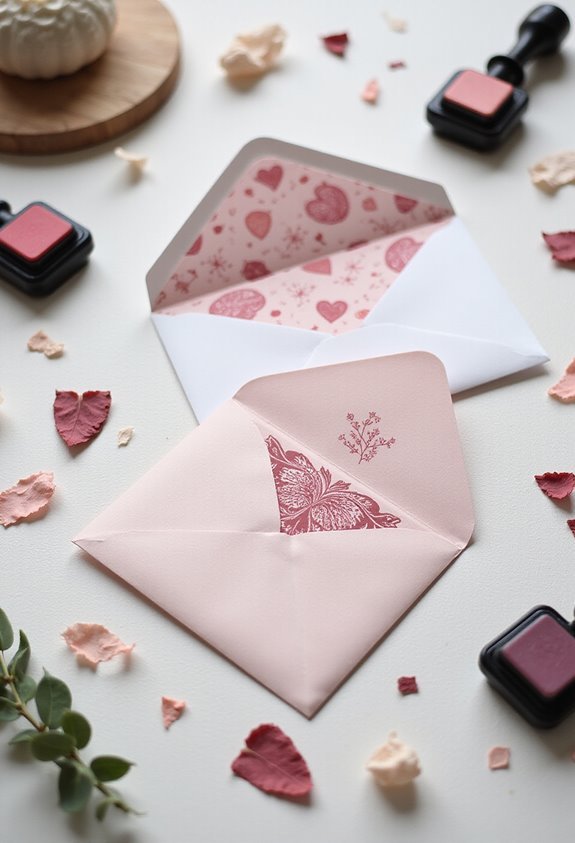
If you’ve already mastered card-making, stamped envelope liners offer a way to extend your Valentine’s artistry to every detail your recipient touches.
You’ll need:
- Cardstock in romantic colors
- Rubber stamps with love-themed designs
- Ink pads in red, pink, or gold
- Scissors for precise cutting
- Envelope templates for sizing
Start by measuring your envelopes and cutting cardstock to fit the interior dimensions. Arrange your stamps across the liner, creating balanced patterns without overcrowding. Layer different stamps for depth and visual interest. Once you’ve inked all designs, let them dry completely before inserting liners into envelopes.
These personalized touches surprise your recipient when they open their mail. The effort demonstrates thoughtfulness and transforms ordinary correspondence into keepsakes. Your stamped liners elevate the entire Valentine’s experience, making even the envelope itself memorable.
Salt Dough Heart Ornaments
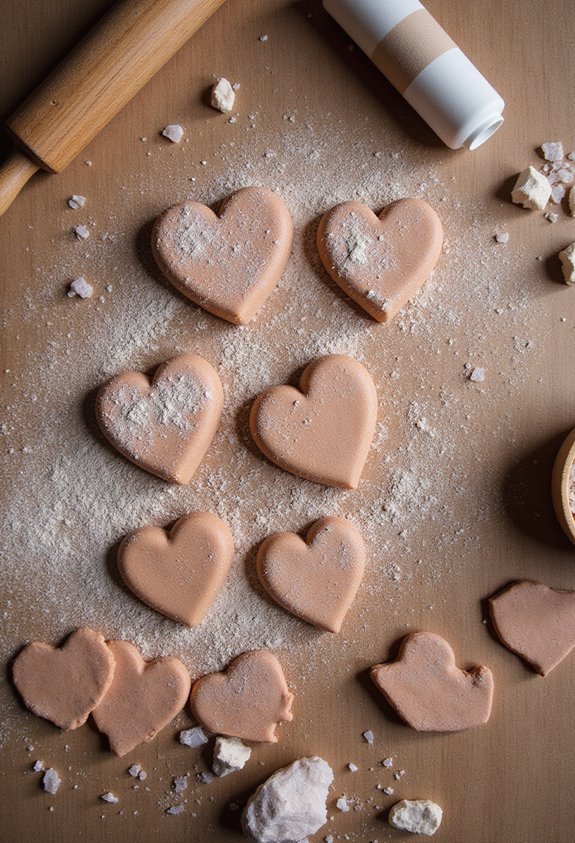
Salt dough ornaments offer a timeless, budget-friendly way to create lasting Valentine’s keepsakes. You’ll need flour, salt, and water—ingredients you likely have at home. Mix equal parts flour and salt, then add water until you’ve formed a workable dough.
Roll out your dough and cut heart shapes using cookie cutters. Press a small hole near the top for hanging. Bake at 250°F for two to three hours until hardened completely.
Once cooled, you can paint your hearts with acrylics in reds, pinks, or whites. Add glitter, metallic accents, or romantic messages. Thread ribbon through the holes for hanging.
These ornaments make perfect gifts for loved ones or tree decorations. They’re durable enough to cherish for years, becoming meaningful mementos of your creative effort.
Decoupage Wooden Heart Box
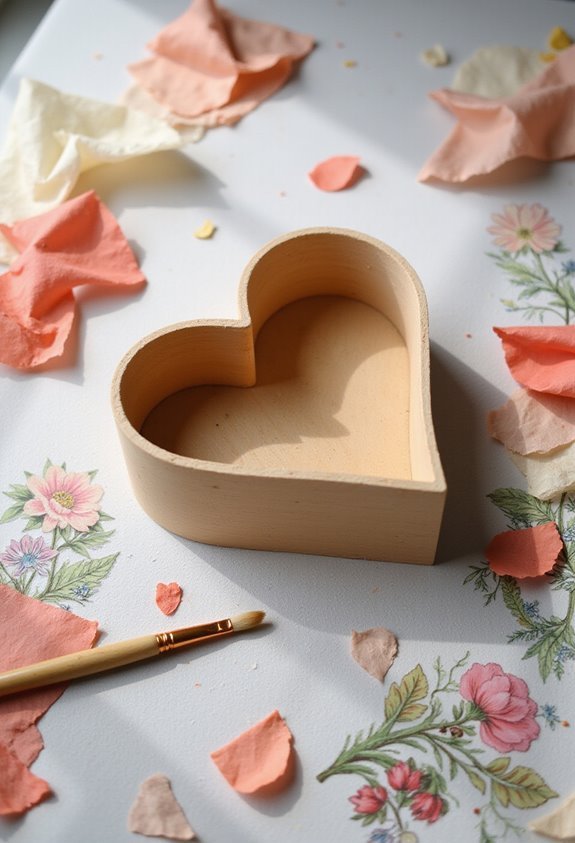
You can transform a plain wooden heart box into a personalized Valentine’s treasure with decoupage. This craft requires minimal supplies and delivers impressive results.
Gather these materials:
- Wooden heart box
- Decorative paper or magazine cutouts
- Decoupage glue or mod podge
- Paintbrush
- Scissors
Start by cutting your chosen images into small, manageable pieces. Apply a thin layer of glue to the box’s surface, then carefully arrange your paper cutouts, smoothing out air bubbles as you work. Layer pieces for visual depth and interest. Once you’ve covered the entire box, seal everything with a final coat of glue for protection and durability.
You’ll create a one-of-a-kind keepsake perfect for storing jewelry, notes, or small mementos. This project takes about two hours and makes an excellent gift.
Printed Handwriting Quote Art
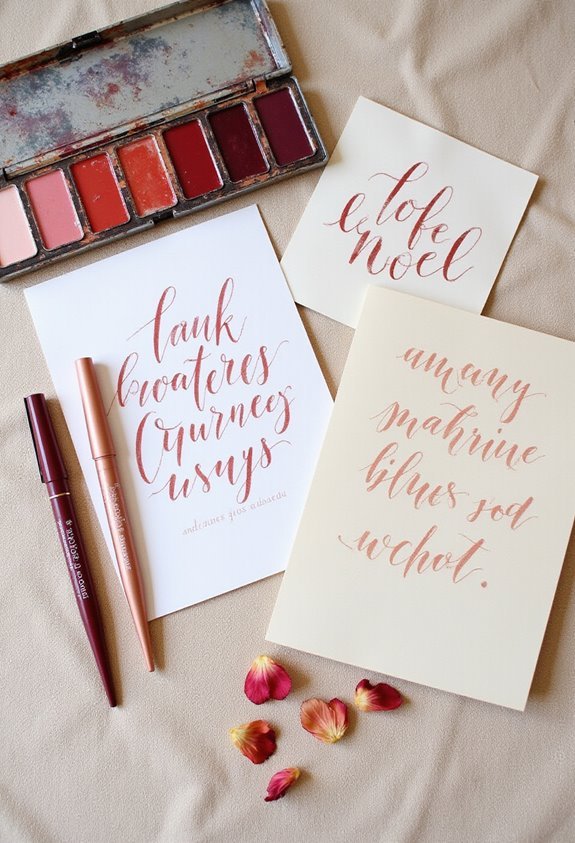
Nothing captures the intimacy of Valentine’s Day quite like handwritten words transformed into meaningful wall art. You can create this project by writing a meaningful quote or personal message by hand, then scanning it into your computer. Once digitized, you’ll adjust the image’s contrast and brightness to make it crisp and clear. Print your quote onto quality cardstock or watercolor paper, choosing a size that fits your desired frame. For added visual interest, you might paint a simple watercolor background behind the text or add delicate illustrations around the words. Frame your printed piece in a shadow box or standard frame, and you’ve created a personalized gift that celebrates your relationship. This project takes just an afternoon and costs minimal materials while delivering maximum sentimental value.
Clay Polymer Heart Jewelry
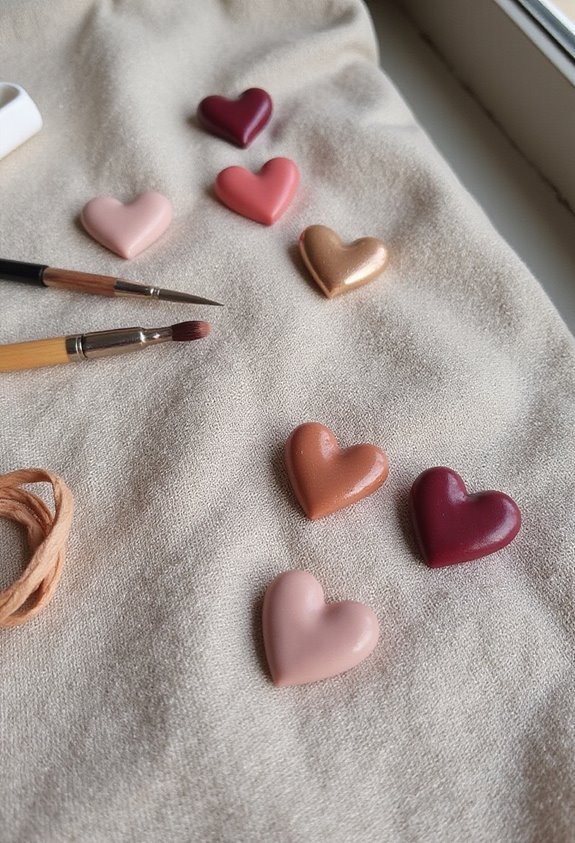
While handwritten quotes capture emotional intimacy, polymer clay offers a tactile way to craft wearable Valentine’s tokens.
You’ll create personalized jewelry that showcases your artistic flair. Here’s what makes this project rewarding:
- Condition the clay by kneading it until it’s soft and pliable
- Shape small hearts using your fingers or cookie cutters for uniformity
- Add texture with toothpicks, stamps, or natural materials for depth
- Bake according to manufacturer instructions, typically 15-30 minutes at low heat
- Embellish finished pieces with acrylic paint, glitter, or metallic finishes
Once cooled, attach jump rings and chains to transform your hearts into necklaces or earrings. You can gift these unique creations to loved ones or keep them as reminders of your creative effort. Polymer clay’s versatility ensures no two pieces are identical.
Embroidered Felt Love Patches
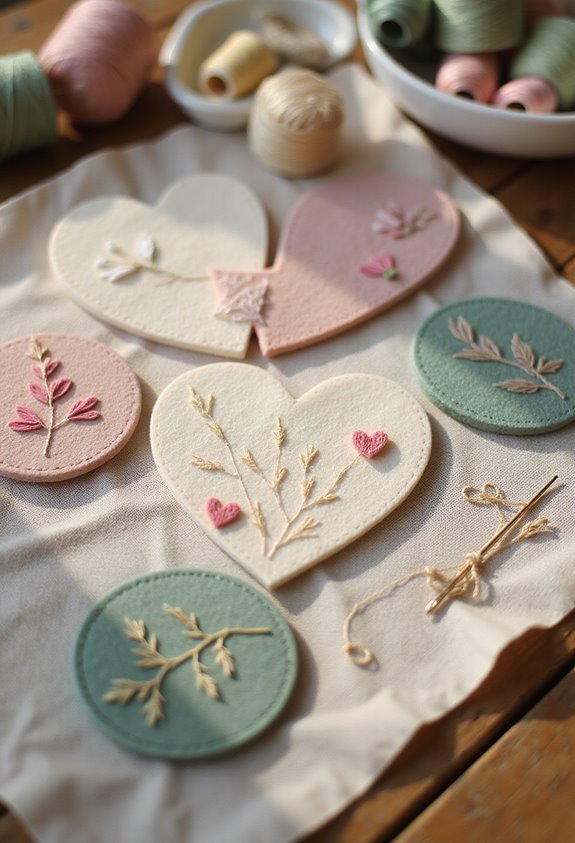
If you’re seeking a handmade gift that combines softness with meaningful detail, embroidered felt patches offer an ideal solution. Start by cutting heart shapes from felt in various colors—red, pink, or white work beautifully. Sketch your design lightly with a pencil, then thread your needle and embroider simple patterns like dots, lines, or “love” lettering across each patch.
Use basic stitches such as running stitches or French knots to add texture and visual interest. Once you’ve completed your embroidery, you can attach patches to clothing, bags, or blankets using fabric glue or hand-stitching. These personalized patches make excellent gifts for friends, family members, or romantic partners. They’re affordable, quick to create, and genuinely one-of-a-kind.
Conclusion
You’ll find that these projects balance simplicity with sophistication—requiring mere paper and paint yet producing gallery-worthy results. While some pieces take minutes to complete, others demand thoughtful patience and care. Whether you’re crafting delicate watercolor garlands or sculpting polymer jewelry, you’re not just making gifts; you’re creating tangible expressions of love. These affordable, accessible projects prove that heartfelt doesn’t mean complicated. This Valentine’s weekend, you’ll discover that the most meaningful presents don’t come from stores—they come from your hands.