

Balayage gets sold as one look, usually caramel on brown hair, usually on someone with waves. In reality the technique changes completely depending on where your hair starts. Near black hair needs different placement than light brown. Ash tones take a different route than warm ones. And the difference between a colour you refresh every two months and one you can leave alone for half a year comes down to how high the paint sits on the strand.
These 11 balayage hair ideas cover that whole range. There’s toffee ribboning for very dark hair, cool mushroom brown for anyone who hates warmth, honey bronde for light brown bases, wine red for something less expected, and a full shadow root blonde for the boldest jump on the list. Each one includes what makes it work, who it suits, and what the upkeep actually costs you.
Find the shade closest to your own hair, then take that photo to your stylist.
1. Toffee Ribbon Balayage on Near Black Hair
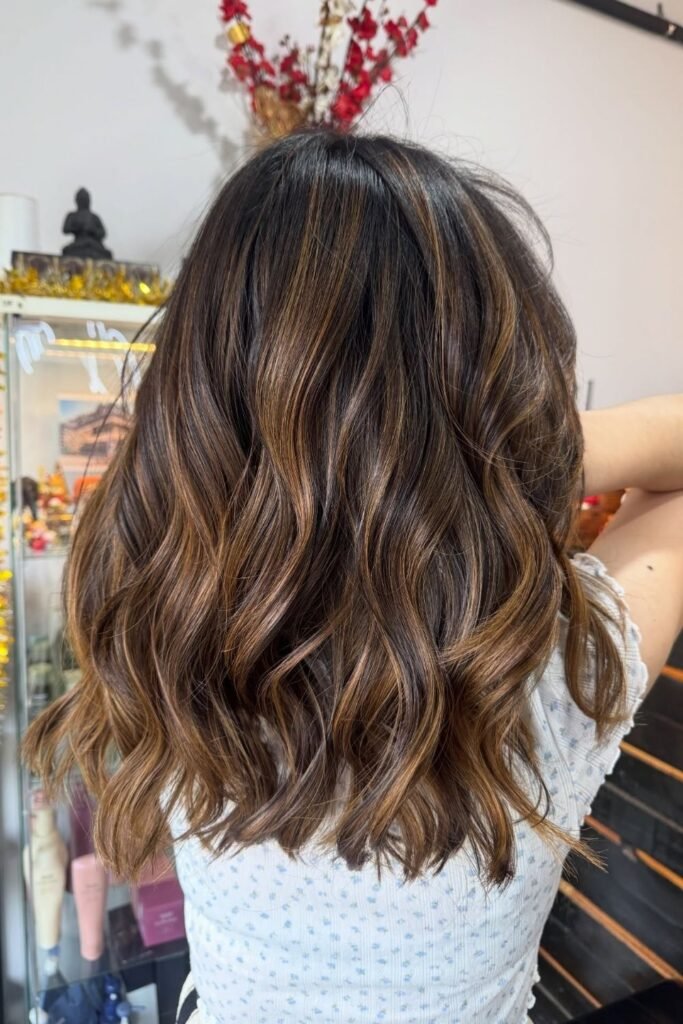
Dark roots left almost untouched, then warm toffee painted in loose ribbons from the ear down. That gap between the deep top and the caramel ends is what keeps this looking expensive instead of stripy.
What’s happening in this photo:
- The base stays a true dark brown, so regrowth barely shows
- Highlights sit in wide, uneven strips rather than thin foil lines
- Colour brightens gradually toward the ends, heaviest in the last few inches
- Loose S waves bend the ribbons so the warm and dark tones keep swapping places
The waves matter more than people expect. Straightened, this same colour reads flatter and the painted sections look like separate blocks. Curled, it looks like light hitting hair.
Worth knowing before you book: a collarbone cut like this shows off painted colour better than very long hair, because the eye takes in the whole fade at once.
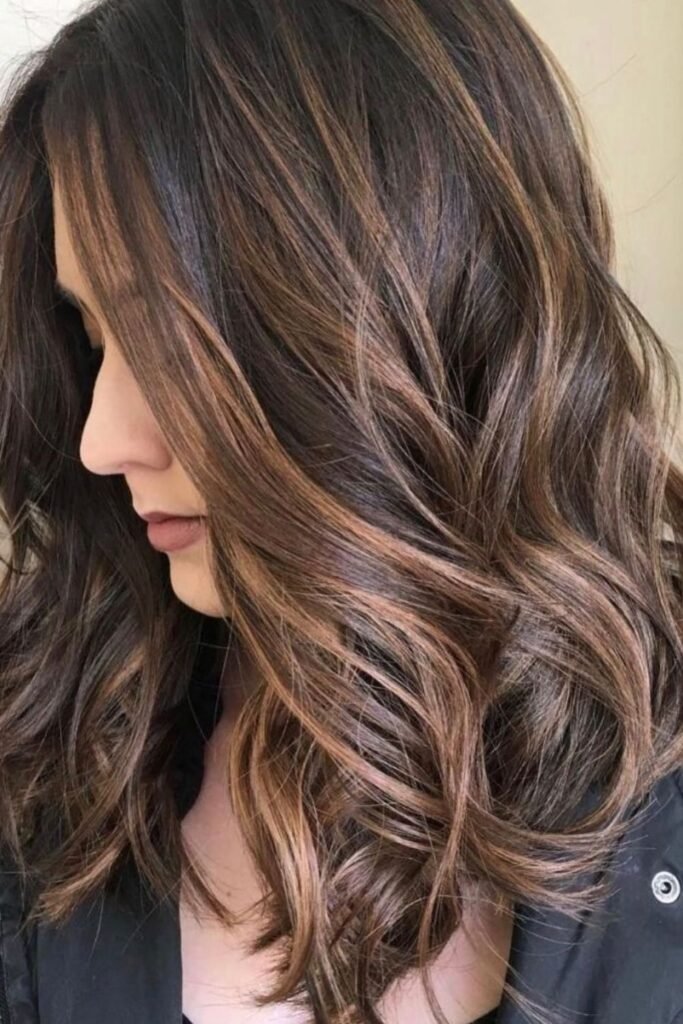
2. Cinnamon Balayage With Face Framing Pieces
Copper is doing the heavy lifting here. The base is a cool dark brown, but the painted pieces pull warm and reddish, and the brightest ones sit right along the part and around the face.
What works in this look:
The placement. Colour starts higher near the face and lower everywhere else, which lifts the whole side profile.
The tone clash. Cool brown against warm cinnamon gives more contrast than a matched brown on brown blend.
The layers. Long layers let the copper show up on the surface instead of hiding underneath.
One honest caution. Warm copper tones fade faster than neutral ones, and they tend to go brassy orange as they wash out. A colour depositing conditioner in a similar shade every couple of weeks holds it much longer.
Ask for brighter pieces around the face and softer ones at the back.
Wash with cool water to slow the fade.
Bring a photo showing the copper tone you mean, since warm covers a wide range.
Purple toning shampoo, which fights the warmth you paid for.
Evenly spaced highlights, which turn painted colour back into stripes.
Going lighter than three levels above your base in one sitting.
3. Cool Mushroom Brown Balayage for Espresso Hair
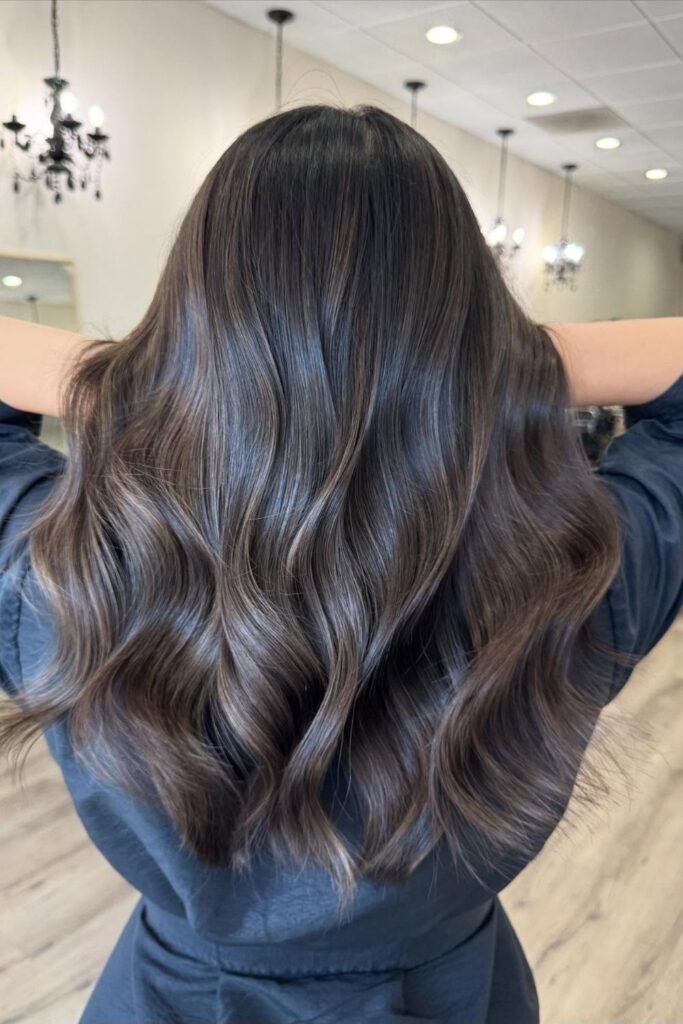
Not every balayage has to look warm. This one goes the other direction, blending smoky greyish brown into a deep espresso base, and the result is closer to a shine treatment than a colour change.
The blend starts low, around mid-length, and stays subtle through the ends. On long glossy hair like this, the payoff is dimension you notice when the light moves, not colour you notice from across the room.
Ash tones are also the harder ask at the salon. Dark hair holds warm pigment underneath, so lifting it without going orange takes skill and usually more than one appointment. Say the words “cool” and “no warmth” out loud rather than relying on the photo alone.
Best for anyone who wants their hair to look richer without looking coloured.
| Cool ash balayage | Warm caramel balayage |
|---|---|
| Subtle shift, reads as shine | Obvious lift, reads as highlights |
| Suits cool or neutral skin tones | Suits warm and olive skin tones |
| Needs regular toning to stay grey | Fades warmer, which most people forgive |
| Often takes two sessions on dark hair | Usually achievable in one |
4. Honey Bronde Balayage for Light Brown Hair
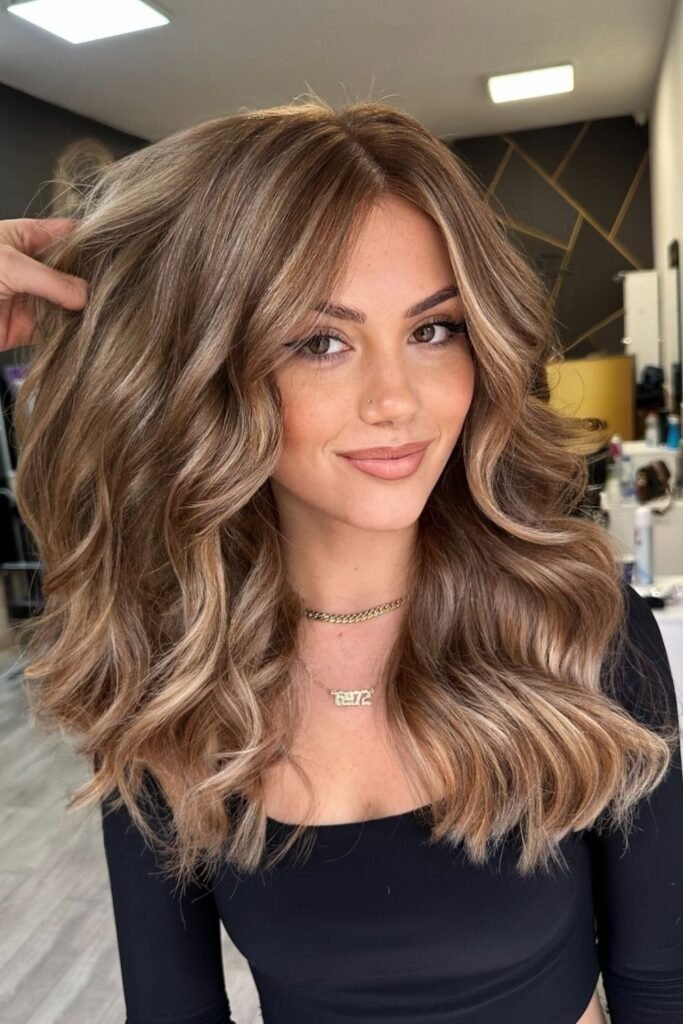
Mid brown hair sits right in the sweet spot for balayage, and this photo shows why. The base only needed lifting a couple of levels to land on honey and soft beige, so the blend looks natural instead of bleached.
Details worth copying:
- Highlights start high, close to the roots, with just enough darkness left on top to keep depth
- Two tones running together, warm honey and a cooler beige, which stops it looking flat gold
- The brightest pieces sit right at the front, framing the cheekbones
- Soft bends in the wave rather than tight curls, so the colour reads as one gradient
Because the lift is small, this is one of the gentler options on hair health. It also grows out politely, which means longer between salon visits.
5. Golden Caramel Money Pieces Through Long Dark Hair
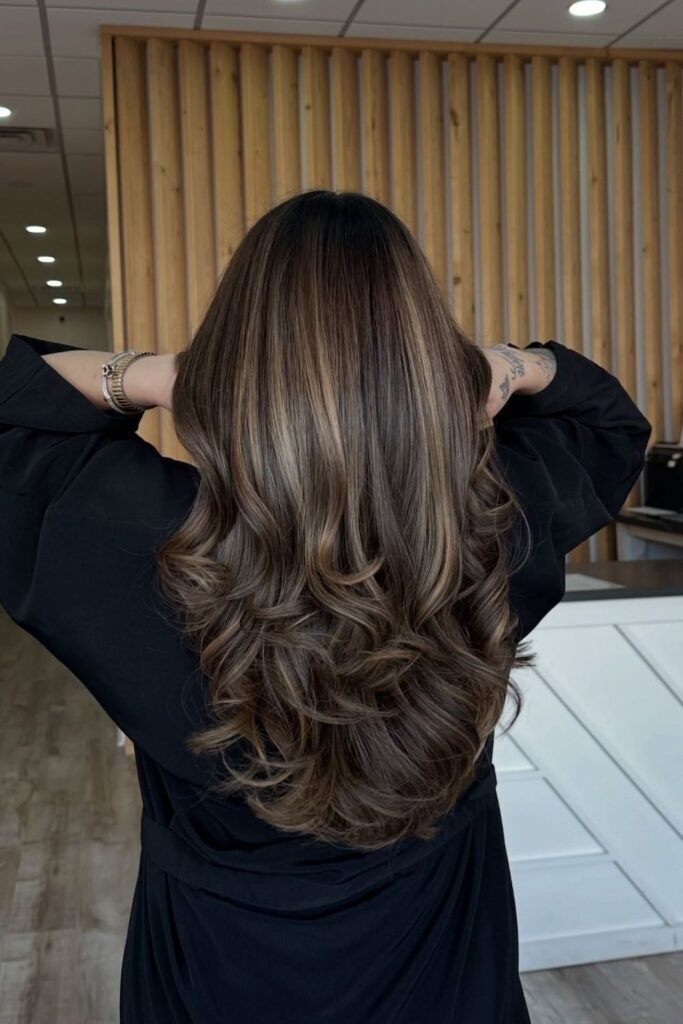
Long hair swallows subtle colour. That’s the problem this one solves, by placing chunky golden caramel pieces high enough on the mid-lengths that they’re visible even when the hair hangs straight down the back.
The dark base stays dominant, maybe seventy percent of what you see, and the caramel does the rest. Ends were curled and brushed out, which fans the bright pieces across the surface instead of letting them sink underneath the top layer.
💡 Quick Tip
On hair this long, ask your stylist to paint some pieces starting at the top of the ear rather than all from the shoulder down. High placement is what makes long balayage show up in photos and in the mirror.
Layered ends help too. Blunt long hair gives colour one flat surface to sit on, while soft layers create edges that catch light. If you’re growing your hair out and refusing a trim, expect a quieter result than this photo.
6. Shadow Root Blonde Balayage on a Straight Lob
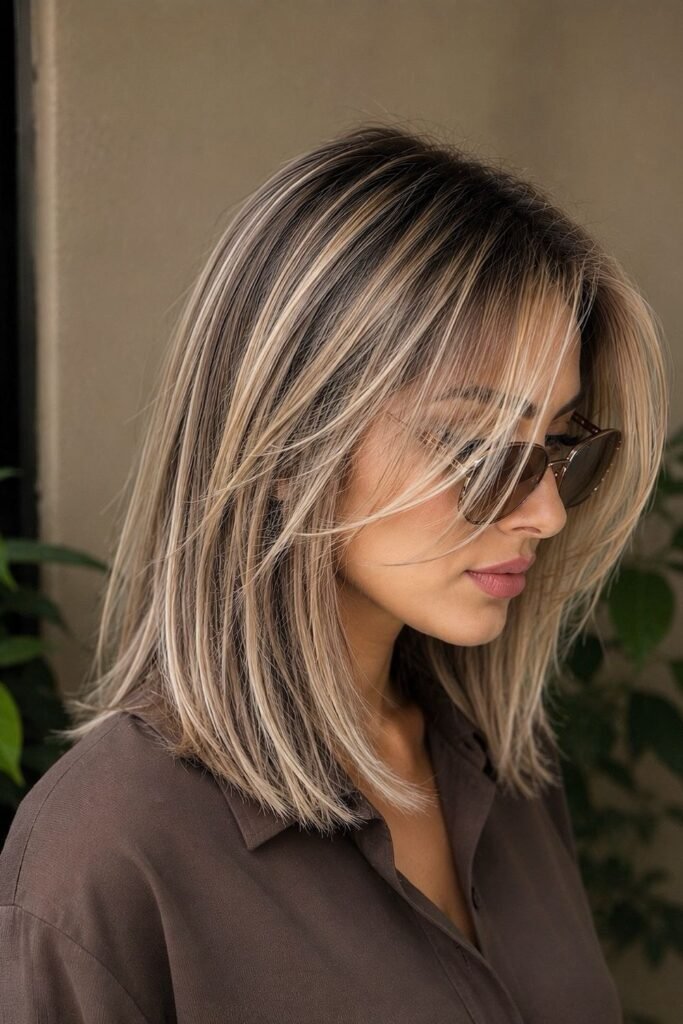
Now for the biggest jump on the list. Deep brown roots melting into near platinum ends, worn on a sleek shoulder length cut where every strand of contrast is on display.
Straight styling is a bold choice with this much difference between root and tip, since waves usually soften the transition. Here the stylist relied on very fine, closely packed pieces instead, so it blurs the way a wave would.
How this look comes together:
Lift the mid-lengths and ends over one or more sessions, depending on your starting shade.
Keep or add a deliberate dark shadow at the root so regrowth blends instead of forming a line.
Tone the blonde cool, then refresh that toner every few weeks as it washes out.
Book a bond building or deep conditioning treatment into your routine, since heavily lifted ends get fragile.
The shadow root is the practical genius of this look. It buys you months before the grow out bothers you.
7. Mocha Balayage With Fine Ribbon Highlights
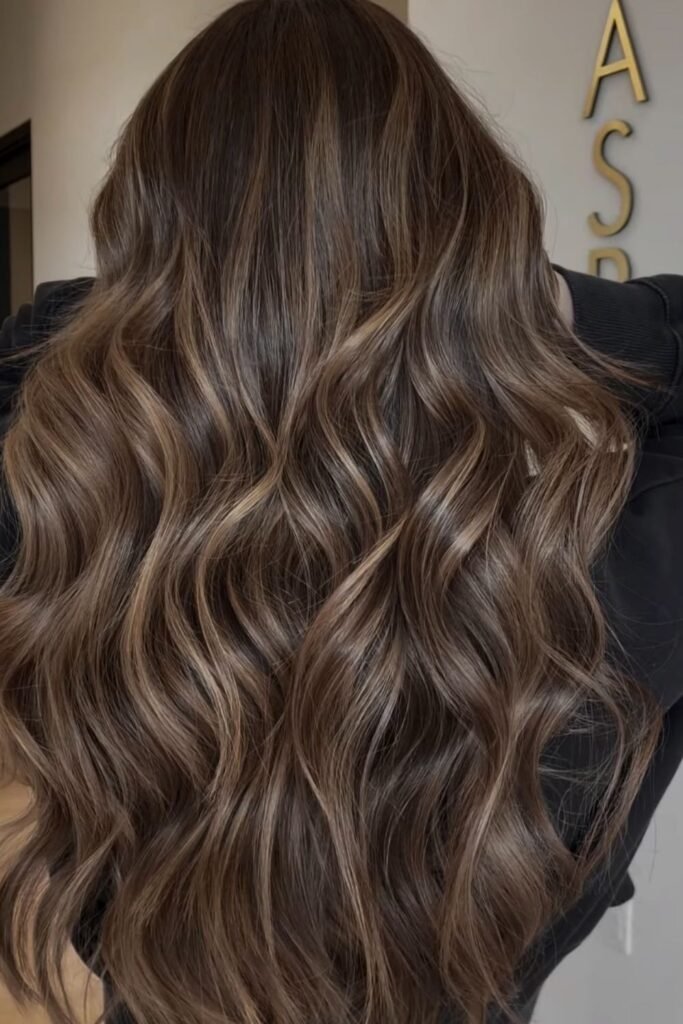
Count the tones in these waves and you’ll find at least four, from deep espresso down through mocha to a soft sandy blonde. None of them jumps out on its own. That’s the whole point of a fine ribbon technique, where the painted sections are narrow and stacked close together instead of wide and separated.
The effect is depth rather than contrast. From a distance the hair just reads as rich brown, then it moves and the lighter threads appear.
This works especially well on thick hair, because there’s enough of it to hold that many shades without any single one taking over.
Recreate this look
8. Chestnut Balayage Built Around Long Layers
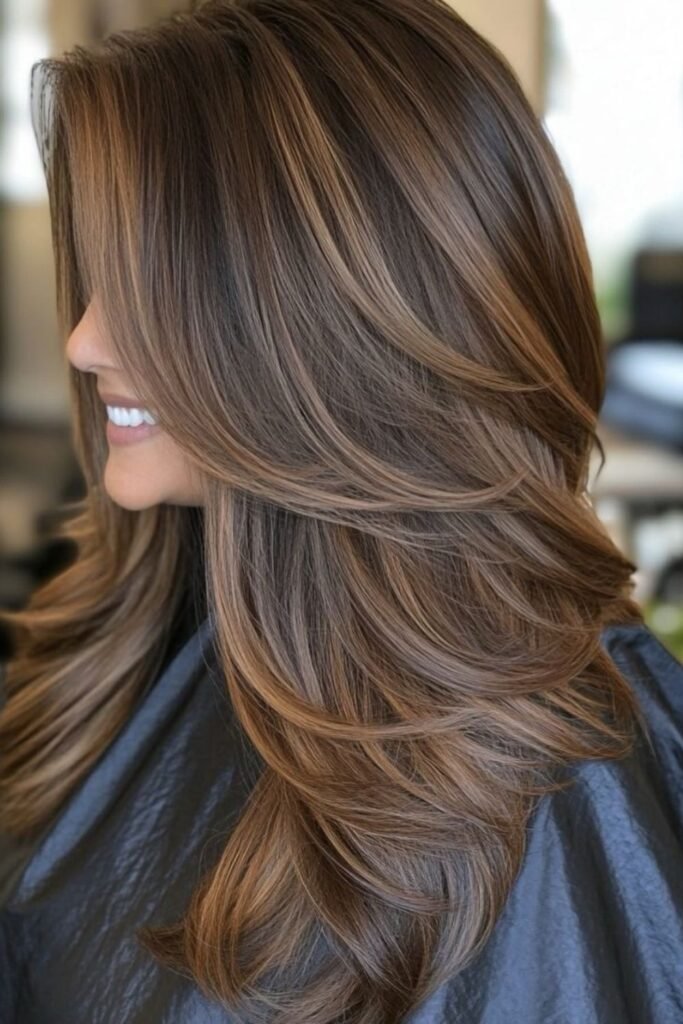
Layers and colour are working together in this one. The highlights aren’t scattered randomly, they follow the shape of the cut, sitting brightest along the edge of each layer where the hair flicks out.
That’s a specific ask, and worth naming at the consultation. A stylist who cuts first and then paints to the layers gets this result. Paint first, cut after, and you lose half the placement.
The tone itself is a warm chestnut with a red pull, lighter than the base but nowhere near blonde. On someone who wants richness without commitment to a big lift, this hits the mark.
Colour placed along the edge of each layer makes a haircut look twice as full, because every flick and turn catches the light differently.
Blow drying with a round brush is what finishes it. Air dried, the layers sit flatter and the placement stops showing.
9. Wine Balayage on Dark Brown Hair
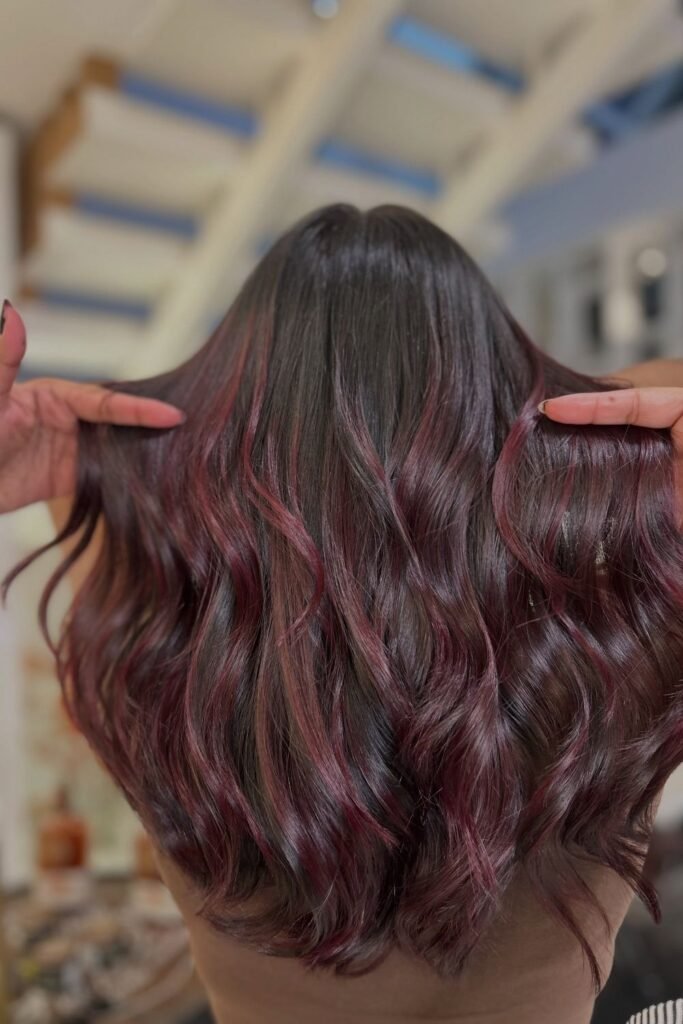
Burgundy is the sleeper option for anyone with dark hair who’s bored of caramel. Here it’s painted in soft vertical streaks through a deep brown base, and because red pigment sits closer to natural dark hair than blonde does, it needs far less lifting to show up.
The shade lands somewhere between plum and cherry, deepest near the roots and clearest through the wavy mid-lengths. Indoors it almost reads as brown. Outside or under warm light, the wine tone comes forward.
One flat dark brown that photographs as a solid block with no visible movement, even when styled in waves.
The same dark base with wine coloured streaks that catch light and separate the waves, without needing heavy bleach.
Fair warning on upkeep. Red and violet pigments are the fastest to wash out of any colour family, so plan on a gloss or colour depositing mask to keep it from sliding into a dull brown after a month.
10. Lived In Caramel Balayage That Grows Out Slowly
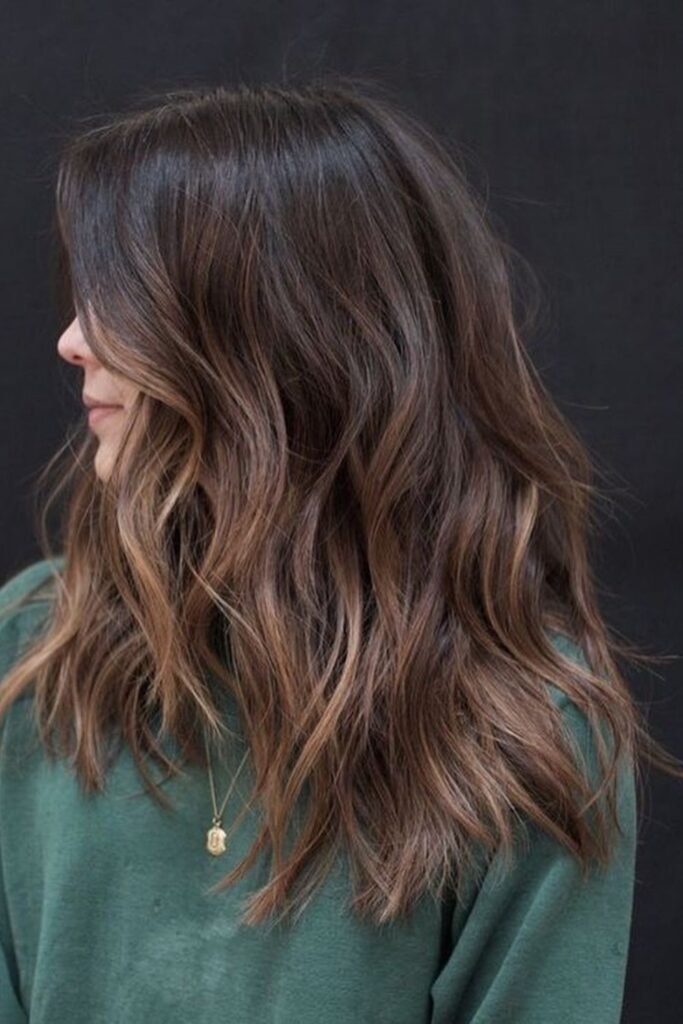
Some colour is meant to look brand new. This one is meant to look like it’s been there a while, in the best way.
The highlights are soft, warm caramel, and they stay low on the strand. Nothing bright happens above the ear. Combined with an air dried, slightly undone texture, the result reads as hair that’s been out in the sun rather than hair that’s been in a salon chair.
Why this suits a busy schedule:
- ▸Low placement means there’s no obvious regrowth line to chase.
- ▸Soft, blended edges hide unevenness as the colour fades.
- ▸The lift is gentle, so ends stay in decent condition between visits.
- ▸Rough dried texture suits it better than a smooth blowout, which saves styling time.
Six months between appointments is realistic here. That’s rare for coloured hair.
11. Chunky Golden Highlights on a Chocolate Base
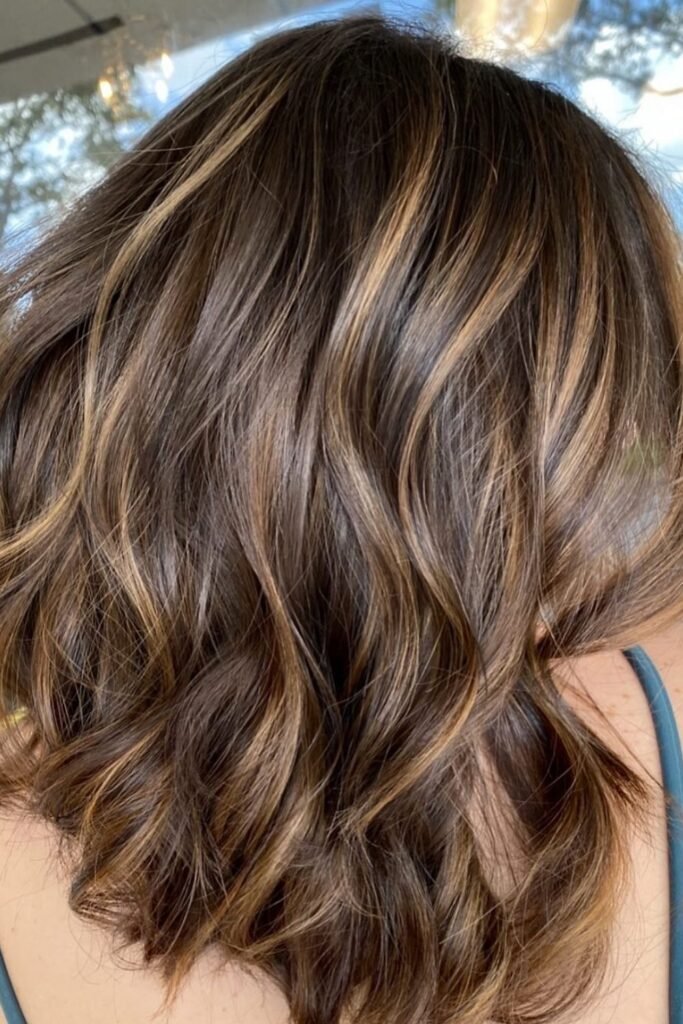
The last idea goes in the opposite direction from the one above. Thick golden blonde pieces, placed high and close to the crown, sitting against a rich chocolate brown base with nothing subtle about the contrast.
Sunlight in this photo shows what the technique is built for. The bright sections catch light first and pull your eye straight to the top of the head, which is exactly why this suits anyone whose hair looks flat or heavy in photos.
A word on placement. Chunky highlights near the roots need a proper root touch up every eight to ten weeks or so, because the line does show. Trade off worth knowing before you commit.
Conclusion
The best version of balayage is usually the one that matches your maintenance appetite, not the one that looks most dramatic in a salon photo. Low placement and soft edges buy you months. High contrast near the crown looks incredible and asks for regular visits. Both are good choices as long as you pick on purpose.
Take a screenshot of the two or three ideas closest to your natural shade before your next appointment, since stylists work far better from images than descriptions.
📌 Good To Know
Save this post to your hair board so you have it ready the next time you want fresh balayage ideas.
