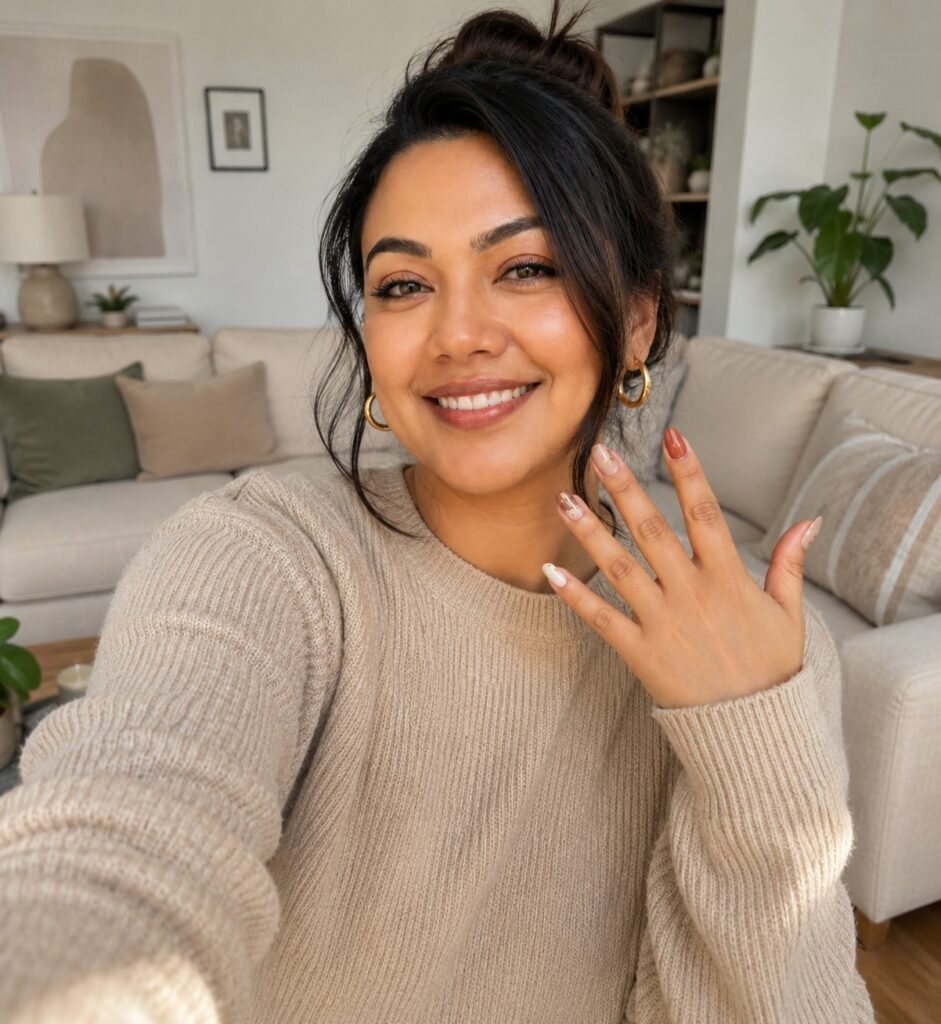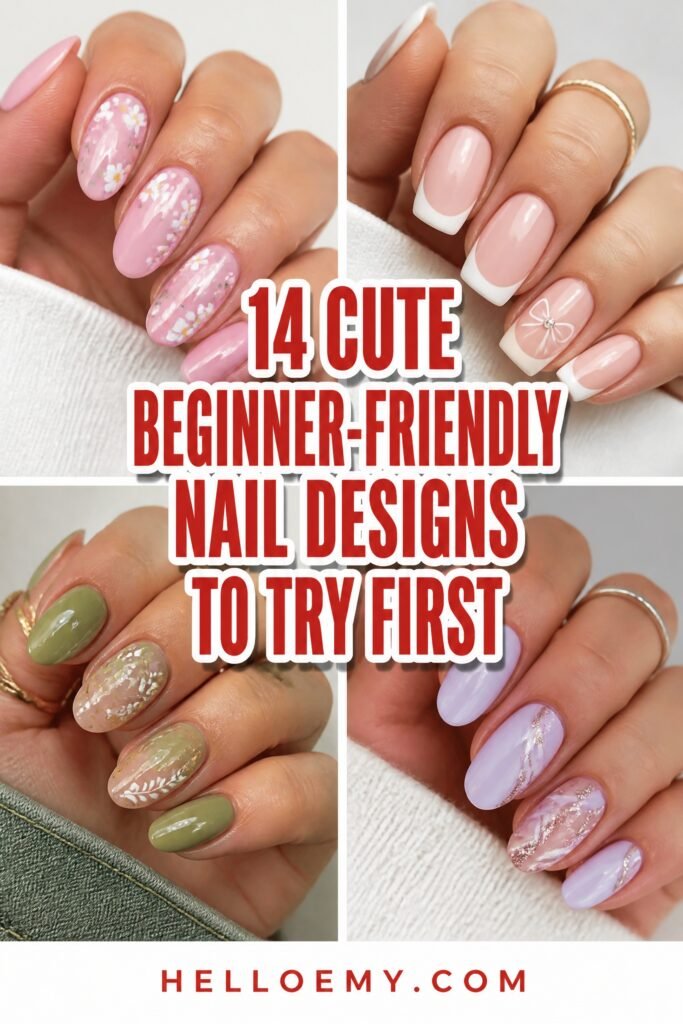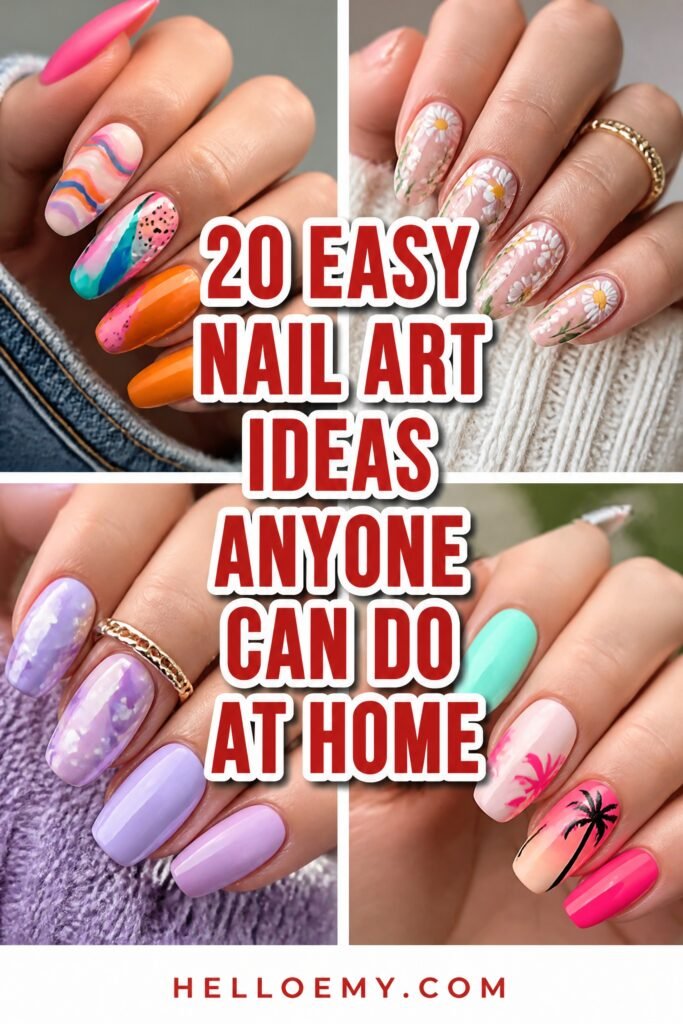
Nail art has become surprisingly accessible, even for total beginners working with a limited budget. A few basic tools from around the house, combined with some patience, are genuinely all you need to get started.
Bobby pins, toothpicks, and tape can replace expensive brushes and stencils without sacrificing quality. “Great nail art starts with patience, not expensive gear,” as one celebrity manicurist puts it, and that rings true across every skill level.
From simple polka dots to delicate gold-flecked starry accents, the range of achievable looks is wider than most people expect. Each technique builds confidence, making the next design feel less intimidating than the one before.
Twenty ideas are laid out ahead, starting with the most straightforward and gradually introducing new touches.
Creativity consistently matters more than experience when it comes to making nails look genuinely polished.
20 DIY Nail Art Ideas Worth Bookmarking
Bobby pins, toothpicks, washi tape, and a makeup sponge cover most of what happens on this list. The rest is polish you already have sitting in a drawer.
Seasonal looks show up toward the end, so if you are planning ahead for holidays or spring, keep scrolling past the everyday designs.
Whichever one you start with, do a single nail first before committing to all ten.
Polka Dot Nails With a Bobby Pin
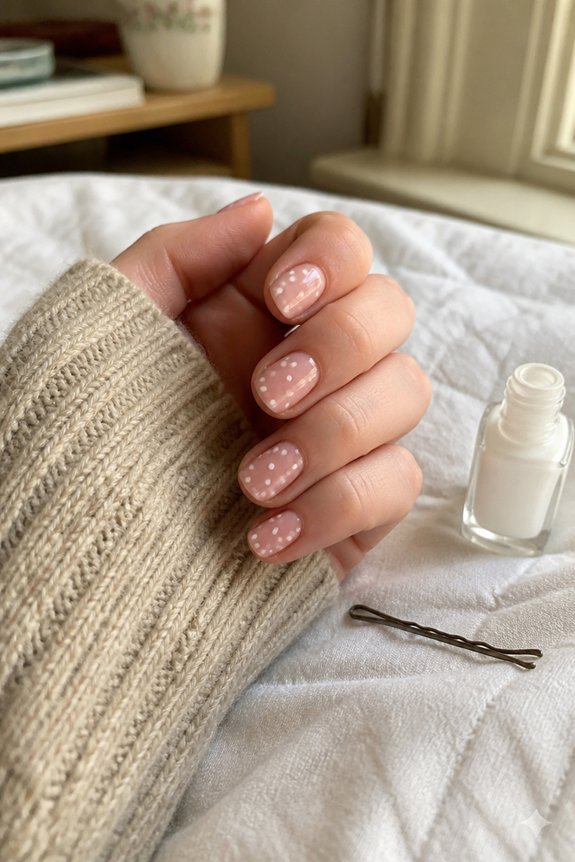
A bobby pin, that unassuming bathroom drawer staple, doubles as a precision tool for one of the easiest manicure trends around. Simply bend the rounded end into a small loop, dip it into polish, and dot away. Try Essie’s “Blanc” against a nude base for contrast. Uniform pressure creates uniform dots. Simple, honestly, we can’t get enough.
Also read: 14 Short Nail Designs That Look Expensive
French Tips With a Colorful Twist
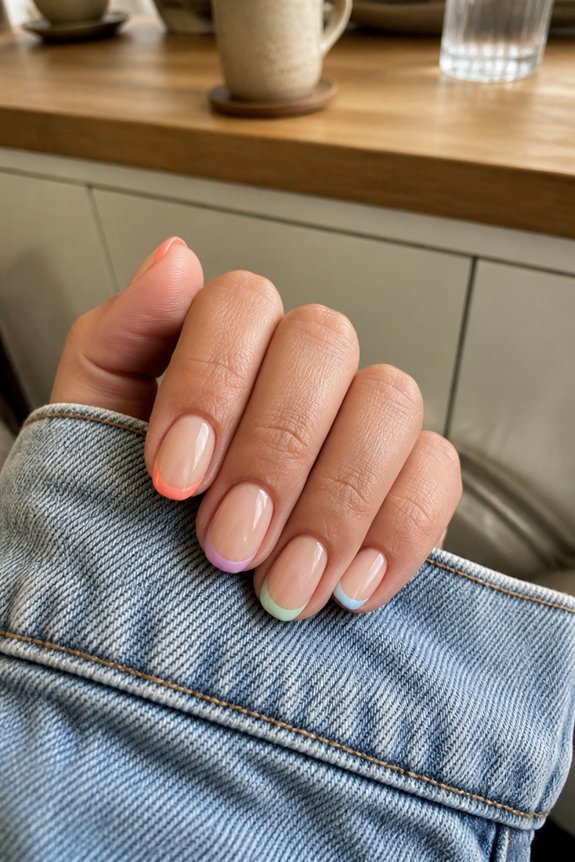
Why stick to basic white when the classic French manicure can handle a serious color update? Swap the tip color for cobalt blue, lilac, or neon orange using a thin striping brush and polish like Essie’s Gel Couture. Keep the base neutral for contrast, we can’t get enough of this pairing.
Striped Nails Using Washi Tape
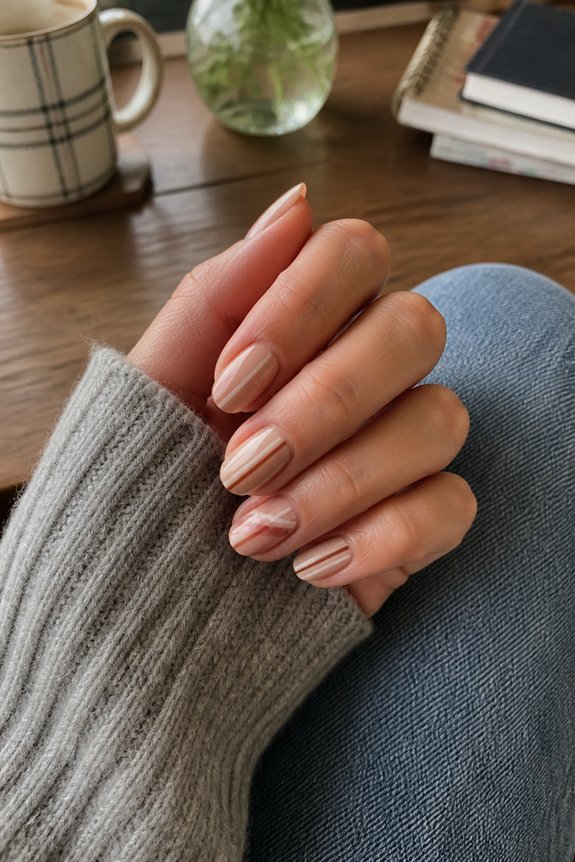
How does a humble craft supply end up on the manicure table? Washi tape, thin and low-tack, creates crisp lines without a steadicam hand. Apply strips over dried polish, paint across, then peel before topcoat seals it. Precision comes from patience, not talent. MI Fabulous tape works well, we can’t get enough of the pattern options.
Negative Space Nails for a Modern Look
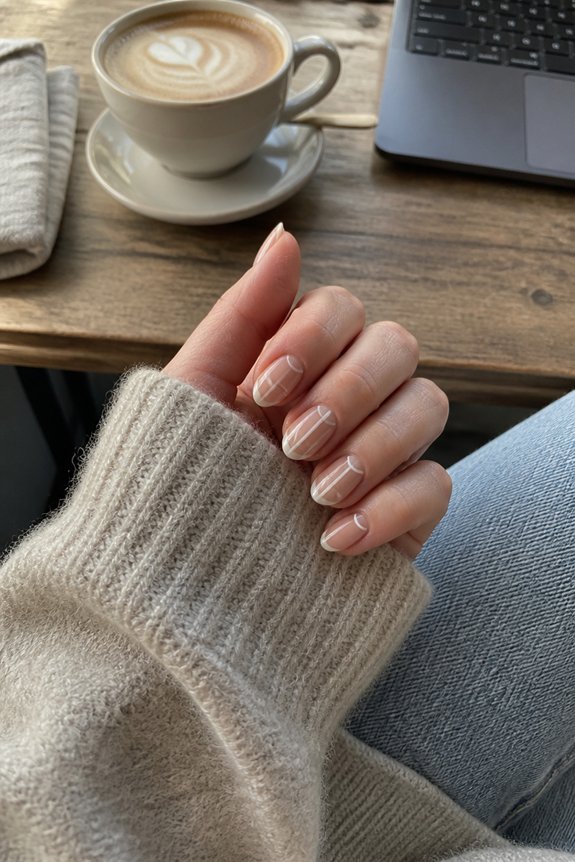
Where washi tape builds pattern through addition, negative space nails work through subtraction. Bare skin becomes the design, framed by clean polish lines. Try a sheer base like Essie Ballet Slippers, then paint a thin geometric border. The gap does the work. We can’t get enough of this understated, modern effect.
Single Accent Nail for Instant Style
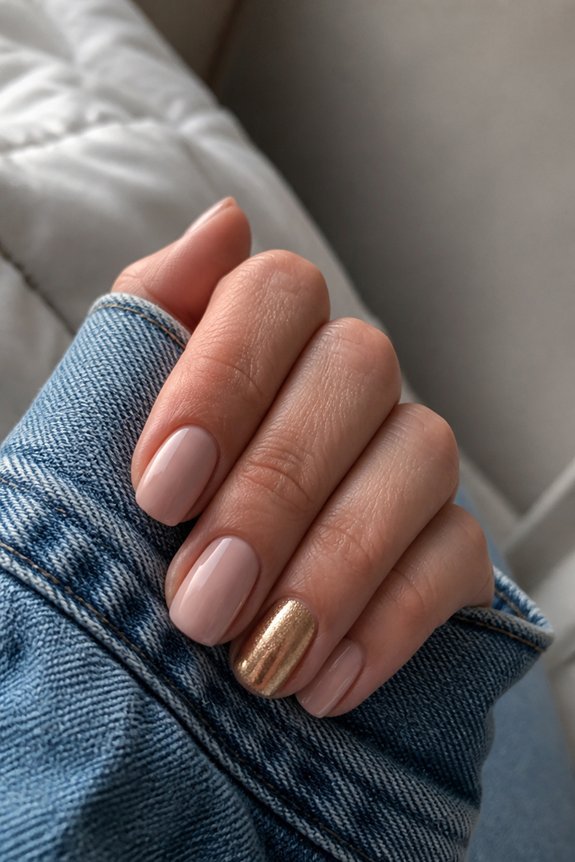
A single standout nail proves that restraint can still make a statement. Paint nine nails in a neutral shade, then finish the ring finger with metallic foil or fine glitter. Try OPI’s chrome powders for dimension.
Subtle, precise, we can’t get enough of this understated trick.
Ombre Nails With a Makeup Sponge
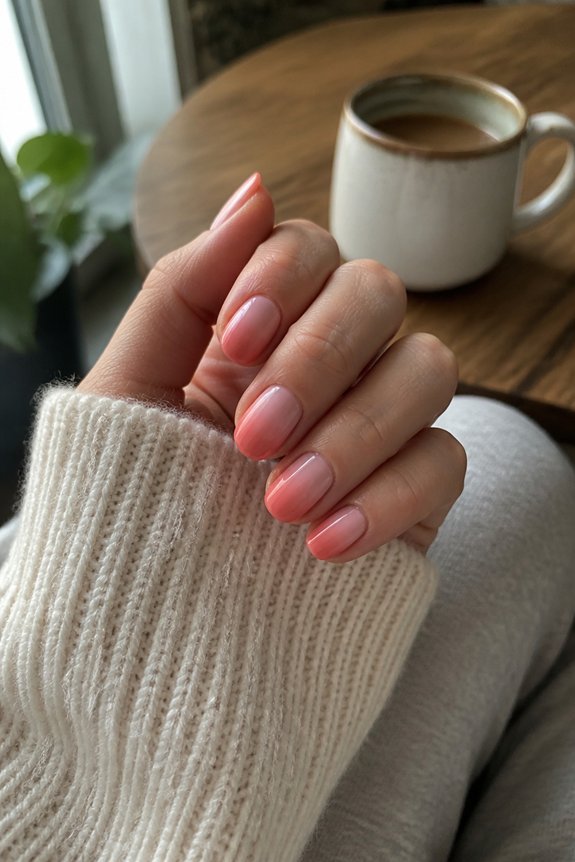
Once two or three polish shades are chosen, a makeup sponge becomes the easiest tool for blending them into a soft gradient. Apply stripes of color directly onto the sponge, then dab gently onto each nail. Essie and Sally Hansen shades layer well together. We can’t get enough of this effect.
Marble Nails Using Water and Polish
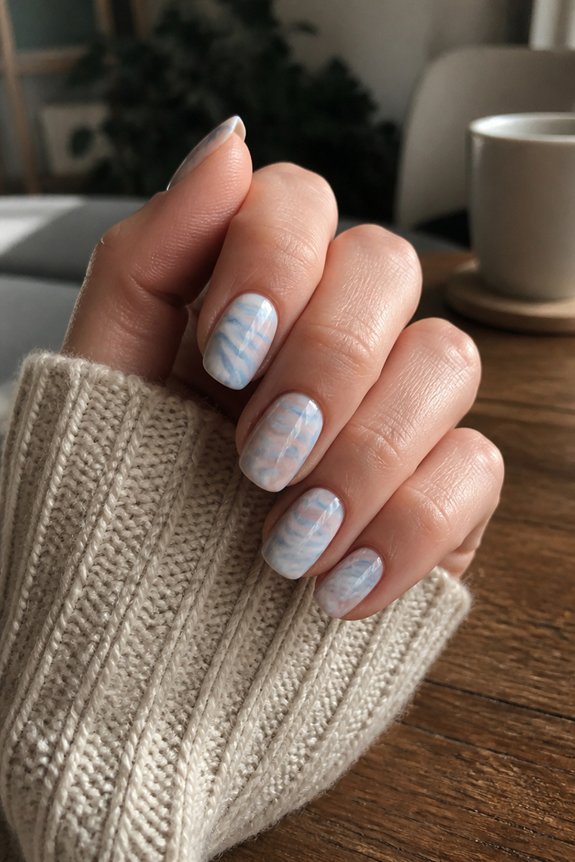
Swirling polish into a cup of room-temperature water creates the classic marble effect, and the technique rewards patience more than skill. Drop colors one at a time, letting each ring spread before adding the next. Drag a toothpick through the layers to form veining. Petroleum jelly around the cuticle saves cleanup. Essie and OPI shades work beautifully—we can’t get enough of the results.
Wait, I need to also fix the em dash in the last sentence.
Swirling polish into a cup of room-temperature water creates the classic marble effect, and the technique rewards patience more than skill. Drop colors one at a time, letting each ring spread before adding the next. Drag a toothpick through the layers to form veining. Petroleum jelly around the cuticle saves cleanup. Essie and OPI shades work beautifully, and we can’t get enough of the results.
Heart Nails for Beginners
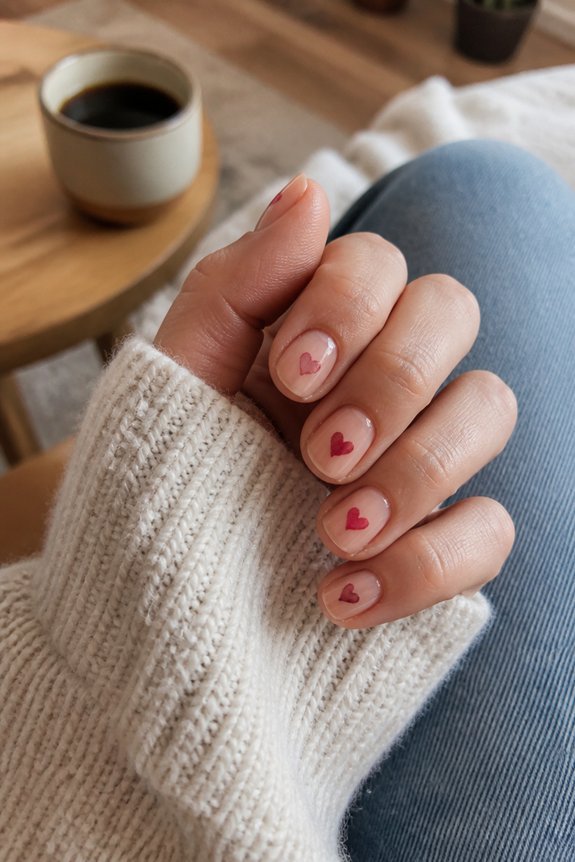
Marbling teaches patience, but heart nails teach precision, and the payoff is just as charming. Two dots, one toothpick, one swipe, that’s the entire technique. Essie’s “Clean Slate” base provides the perfect canvas.
Add a dotting tool for tiny accent hearts. Simple, sweet, and honestly, we can’t get enough.
Geometric Nails With Tape
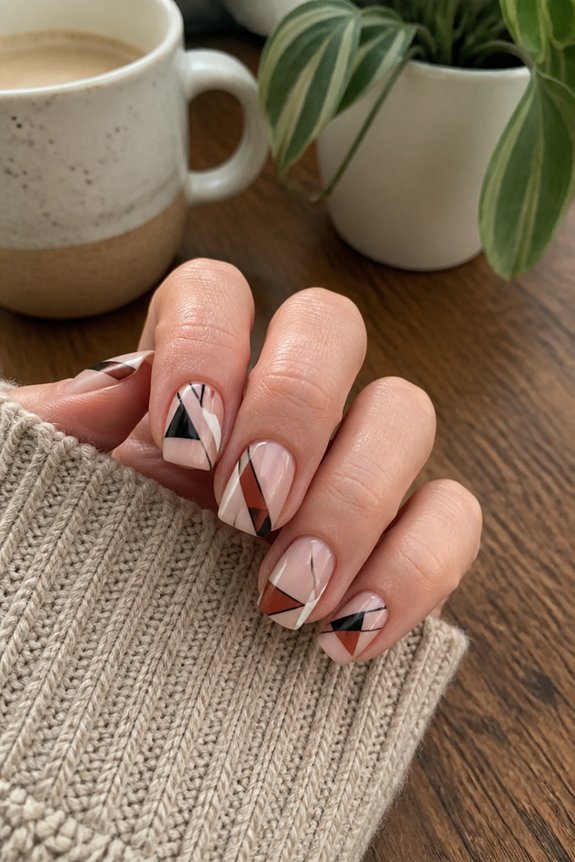
Precision is the quiet architect behind every great geometric manicure. Thin strips of nail vinyl, like those from Duri Rejuvacote Line Tape, block off crisp angles for triangles, chevrons, or color-blocked squares. Apply polish, let it dry fully, then place tape before adding a contrasting shade. We can’t get enough of that sharp finish.
Speckled Egg-Shell Nails
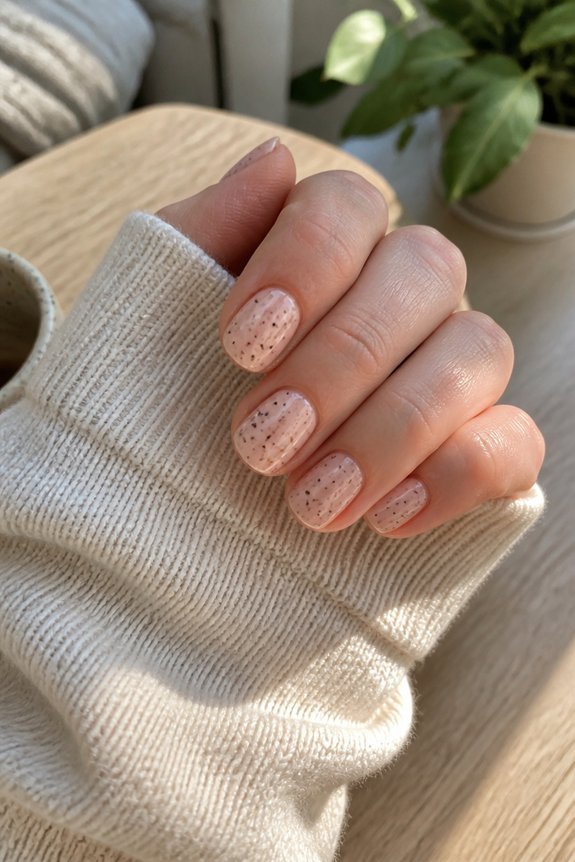
A speckled shell offers the perfect blueprint for this playful manicure. Start with a soft, pastel base coat like Essie’s “Blanc.” Dip a fine-tip brush into brown or black polish, then flick tiny dots across each nail. Vary the speckle sizes for realism.
Seal with glossy top coat for dimension.
Two-Tone Nails for a Bold Look
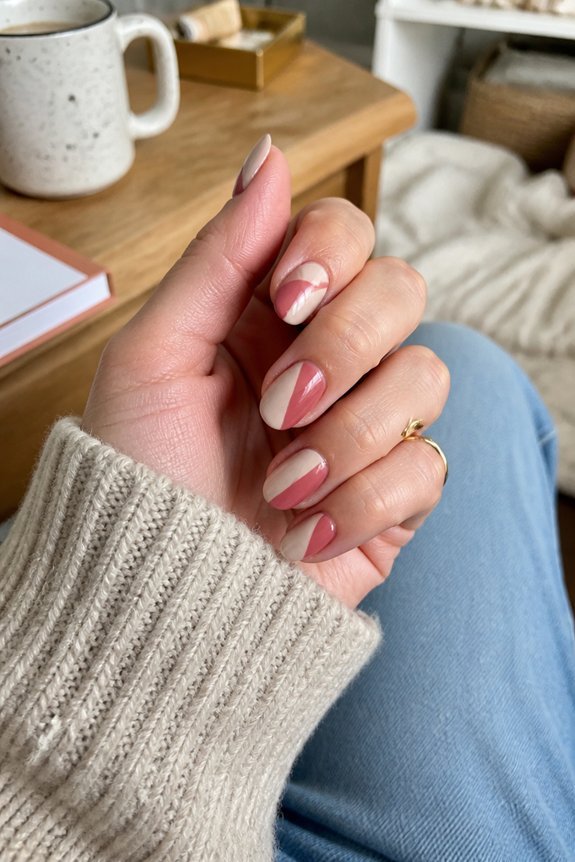
When two colors meet on a single nail, the effect reads modern without trying too hard. A diagonal split or half-moon base works best. Try essie’s “Blanc” paired with a deep wine shade for contrast that feels intentional.
Keep lines crisp with striping tape, we can’t get enough of this graphic finish.
Floral Nails With a Dotting Tool
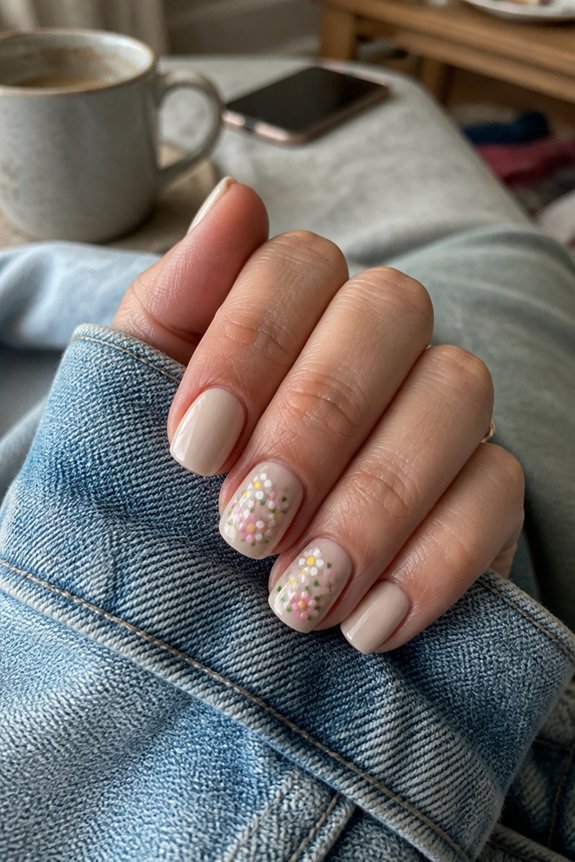
Not every flower needs a full mural to look intentional. Five small dots arranged in a circle, with one center dot, create a simple bloom. A dotting tool set, like those from Bundle Monster, offers various tip sizes for petals and centers. We can’t get enough of this technique.
Checkerboard Nails With Striping Tape
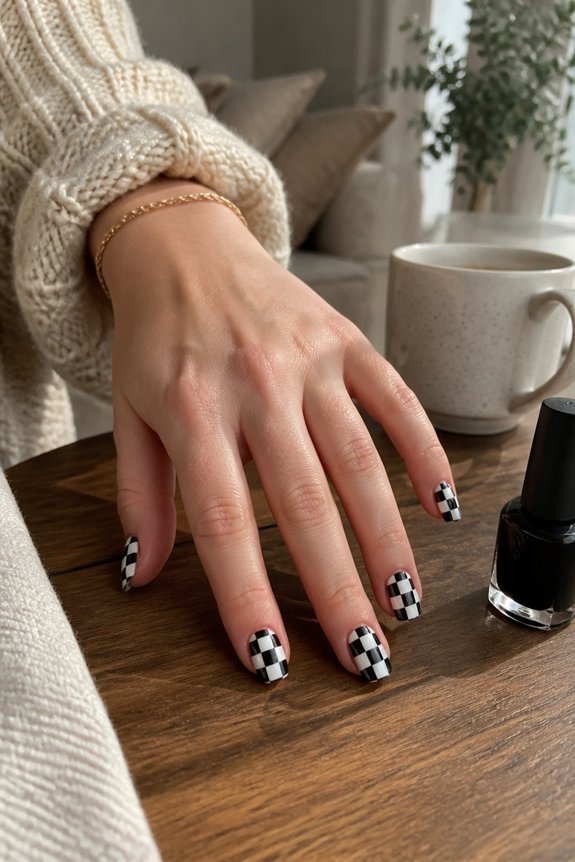
Precision is the whole point of a checkerboard manicure, and striping tape makes it achievable without a steady freelance hand. Apply two base coats, then crisscross thin tape strips to form a grid. Paint alternating squares in contrasting shades before peeling the tape away. Simple, graphic, and we can’t get enough.
Abstract Line Art Nails
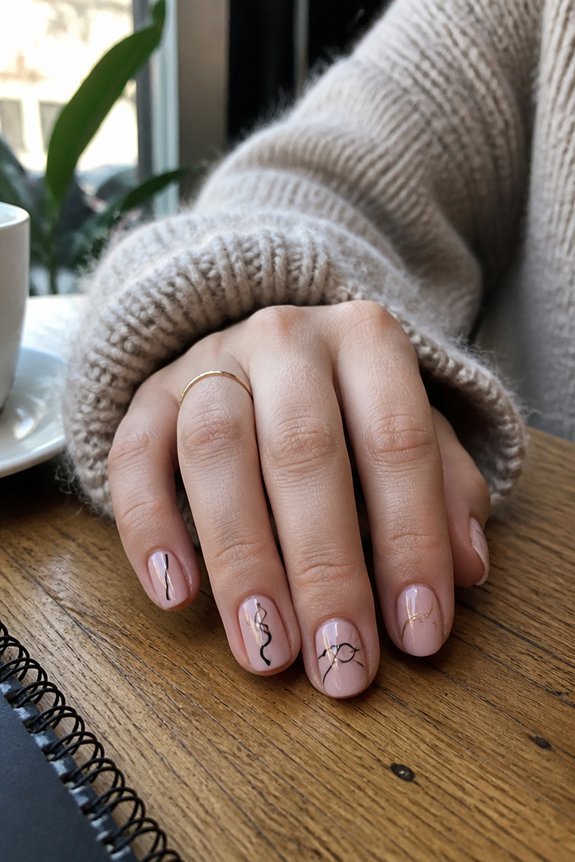
Freehand lines bring a loose, artistic energy that checkerboard grids simply don’t offer. Using a fine detail brush, like the ones in the Kiara Sky Nail Art Brush Set, draw thin, curved, and crisscrossing lines across a neutral base. Vary thickness for dimension. Imperfection is the point here.
Mix in a metallic gel liner for contrast, honestly, we can’t get enough.
Gradient Sunset Nails
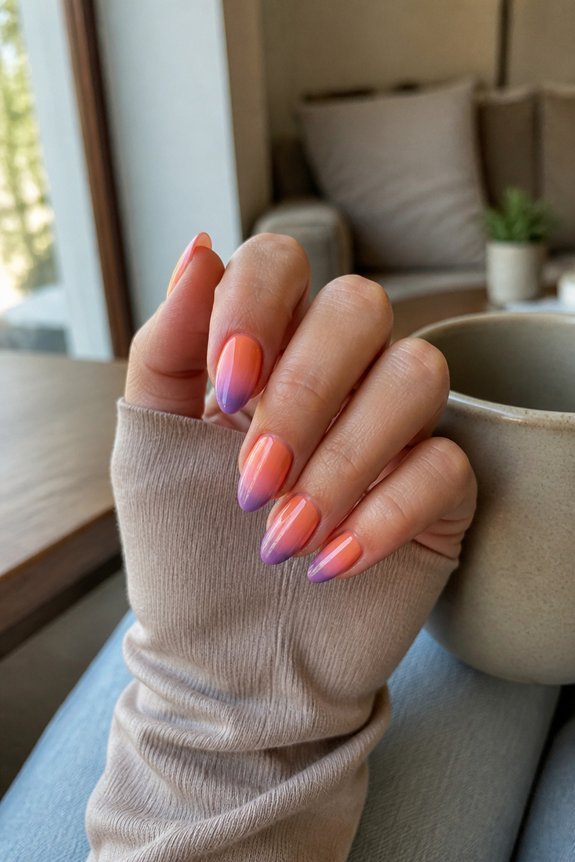
Where abstract lines lean chaotic, gradient sunset nails bring order through color instead of shape. Blend yellow, orange, and pink using a makeup sponge for soft shifts. Essie’s “Sunny Business” and OPI’s coral shades pair well here.
Seal with glossy topcoat. Warm, wearable, we can’t get enough.
Glitter Tip Nails for Extra Sparkle
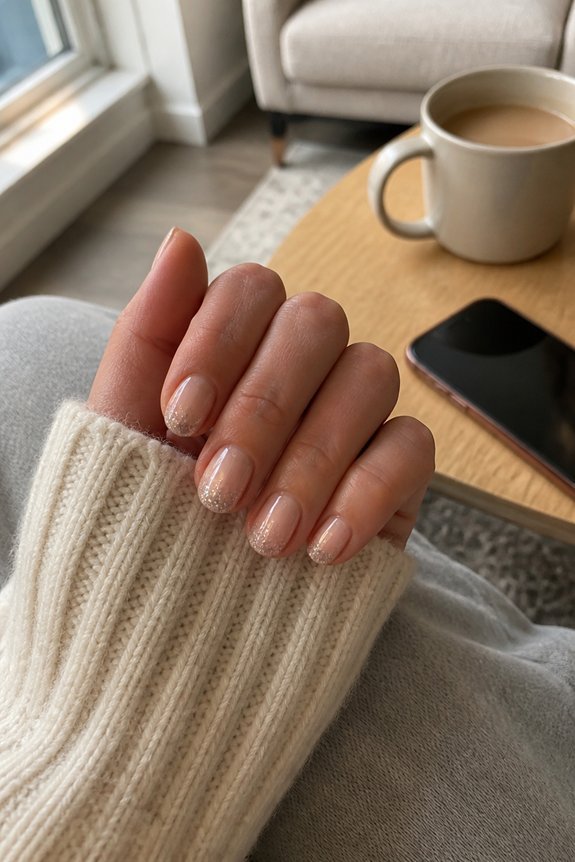
A few coats of glitter can turn a simple manicure into something special. Paint a base color, then apply glitter polish, like Essie’s “A Cut Above,” only to the tips. Seal with topcoat for shine and durability. Glitter tips add dimension without overwhelming the whole nail. Simple, sparkly, we can’t get enough.
Candy Cane Nails for the Holidays
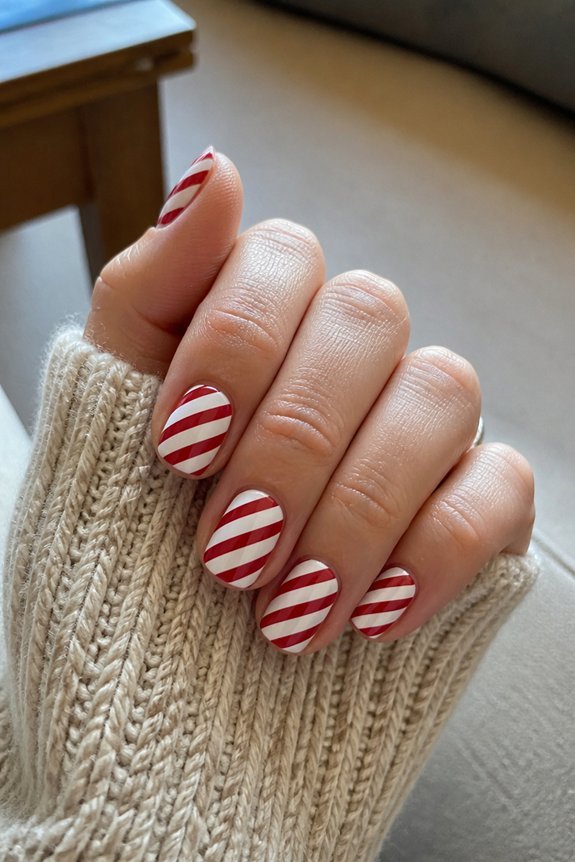
Peppermint swirls aren’t just for stockings; they make for a playful nail design too. Start with a white base, then use a thin brush to paint diagonal red stripes across each nail. A striping tape, like those from Sally Hansen, keeps lines crisp. Finish with glossy top coat, we can’t get enough of the shine.
Pastel Easter Egg Nails
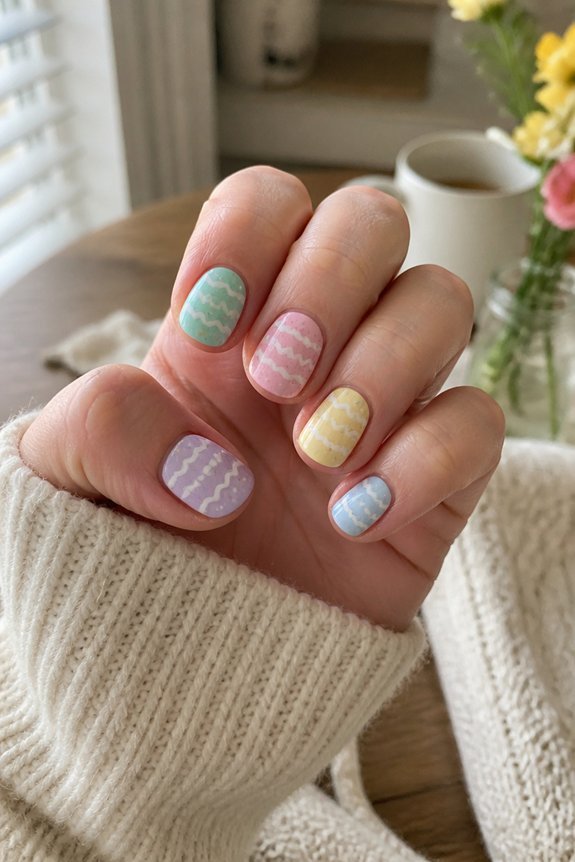
Springtime calls for a softer palette, and this design delivers just that. Coat nails in lavender, mint, or buttercream using Essie’s Spring Collection. Add tiny hand-painted speckles with a dotting tool in contrasting pastels. Finish with matte topcoat for an eggshell effect, simple, seasonal, and honestly, we can’t get enough.
Autumn Leaf Nails for Fall
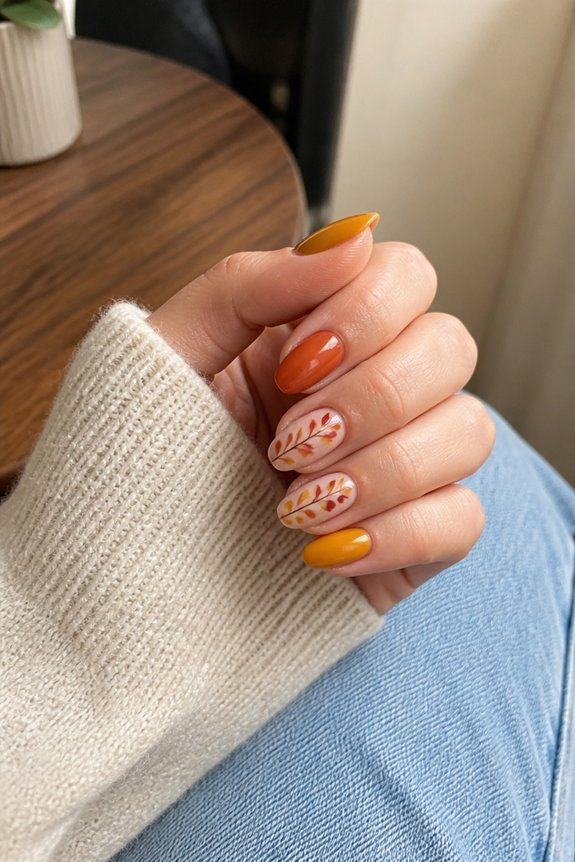
Rich, earthy tones make this design feel like a walk through a crisp October forest. Paint nails in burnt orange or amber using OPI’s “A-Piers to be Tan,” then add tiny leaf accents with a detail brush. Finish with matte topcoat for texture, we can’t get enough of this seasonal look.
Starry Night Nails With Gold Flecks
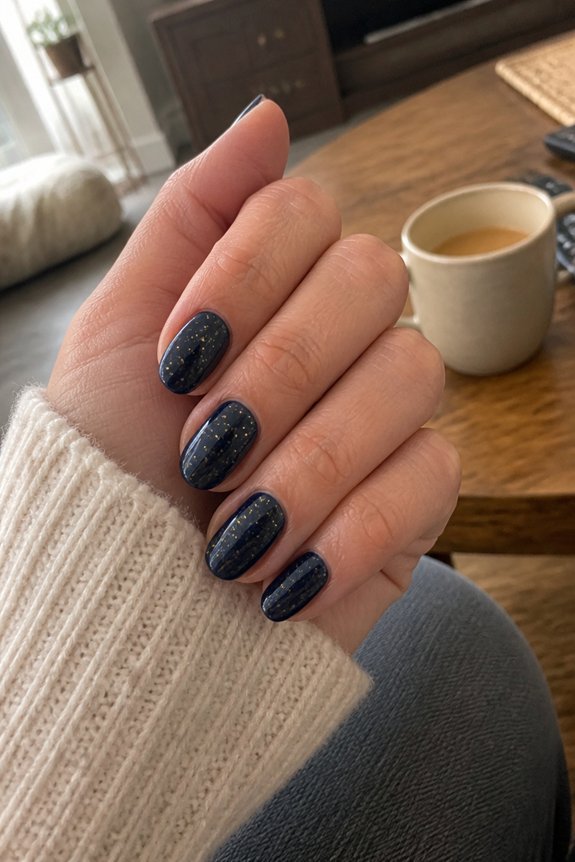
A few coats of deep navy polish set the stage for this celestial-inspired look. Once dry, dab a fine-tip brush loaded with gold flecked polish, like OPI’s Metallic Top Coat, across each nail. Add tiny white dots for stars using a dotting tool. We can’t get enough of this understated sparkle.
Frequently Asked Questions
How Long Does Homemade Nail Art Typically Last Before Chipping?
Homemade nail art typically lasts three to seven days before chipping, depending on application technique, top coat quality, and daily activities. Using a proper base coat, thin polish layers, and sealing edges with top coat greatly extends wear and prevents premature chipping.
What Base and Top Coats Work Best for At-Home Nail Art?
A ridge-filling base coat smooths nature’s imperfections, while a durable, quick-dry top coat locks designs in place. Together, they help colors resist chipping, extend wear time, and keep homemade nail art looking freshly finished for days.
Can I Remove Nail Polish Designs Without Damaging My Natural Nails?
Yes—soaking cotton pads in acetone-based remover, wrapping nails in foil for ten minutes, then gently wiping away polish prevents damage. Avoid scraping or peeling designs off, as this weakens nail layers and increases brittleness over time considerably.
Do I Need Expensive Tools to Create These Nail Art Designs?
No. Studies show 80% of at-home nail art uses everyday items—toothpicks, tape, sponges. Enthusiasts often achieve salon-quality results with basic polish, dotting tools, and household objects, proving creativity matters more than costly equipment for stunning designs.
How Can I Fix Mistakes While Doing Nail Art at Home?
A cotton swab dipped in nail polish remover easily corrects smudges or uneven lines. Cleaning brushes should be kept nearby for precision. Mistakes are simply wiped away, then reapplied carefully once the surrounding polish has fully dried.
Conclusion
DIY nail art continues to grow in popularity, with recent surveys showing nearly 40% of at-home manicurists now experiment with tools beyond polish, like tape, sponges, and bobby pins. That statistic reflects a real shift toward accessible creativity. These 20 techniques prove salon-quality results don’t require salon budgets. From gradient sunsets to starry night accents, small tools create dimensional effects. We can’t get enough of how a few household items transform ordinary nails into wearable art.